
Abstract
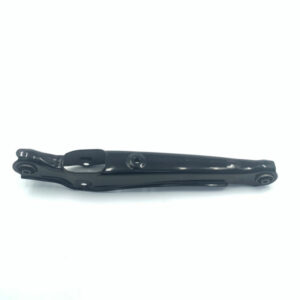
The left lower control arm is a foundational component of a vehicle's front suspension system, acting as a pivotal link between the chassis and the steering knuckle, which holds the front wheel. Its structural integrity and the functionality of its integrated bushings and ball joint are paramount for maintaining proper wheel alignment, steering response, and ride quality. This document examines the complex role of the left lower control arm car component, exploring the nuanced symptoms that indicate its failure, such as audible clunking, instabilidade de direção, and uneven tire wear. It provides a detailed framework for accurate diagnosis, distinguishing control arm issues from failures in related parts like the tie rod or stabilizer link. The discourse extends to the material science of replacement parts, contrasting stamped steel, cast iron, and aluminum constructions. A methodical, step-by-step guide for replacement is presented, emphasizing procedural precision and safety. The analysis concludes by addressing post-installation necessities, particularly the non-negotiable requirement for a professional wheel alignment to restore vehicle dynamics and ensure long-term reliability.
Key Takeaways
- Diagnose popping noises or steering wander to confirm control arm failure before purchasing parts.
- Select a quality left lower control arm car part that matches your vehicle's specific design.
- Use proper safety equipment, including jack stands, before starting any suspension work.
- Always tighten the control arm's bushing bolts at normal ride height to prevent damage.
- Perform a professional wheel alignment after replacement to ensure safety and handling.
- Inspect related components like the stabilizer link and tie rod ball during the repair.
- Understand that clear technician notes are vital for documenting work and ensuring transparency (tvi-mp3.com).
Table of Contents
- A Deep Dive into Diagnosis: Interpreting Your Vehicle's Subtle Cues
- Choosing the Correct Replacement: A Guide to Materials, Design, and Quality
- The Preparatory Phase: Setting the Stage for a Successful Repair
- The Surgical Procedure: A Methodical Guide to Replacing the Left Lower Control Arm
- Post-Installation Protocol: Ensuring Longevity and Performance
- Frequently Asked Questions (FAQ)
- Conclusion
- References
A Deep Dive into Diagnosis: Interpreting Your Vehicle's Subtle Cues
Understanding the health of your vehicle's suspension is akin to a physician interpreting the subtle symptoms of a patient. The suspension system is not a single entity but a complex interplay of interconnected parts, each with a specific role in managing the immense forces generated as a car moves over uneven surfaces. The left lower control arm car component is a primary actor in this mechanical drama. When it begins to fail, it does not typically do so silently. Instead, it communicates its distress through a variety of auditory, tactile, and visual signals. Learning to interpret these signals with precision is the first and most foundational step in any successful repair, preventing misdiagnosis and the unnecessary replacement of healthy components. It requires a patient and methodical approach, moving from the most obvious symptoms to the more subtle indicators of wear.
The Symphony of Suspension Noises: Deciphering Clunks, Pops, and Groans
The most common symptom that alerts a driver to a potential issue with a left lower control arm is noise. These are not the normal, muted sounds of a healthy suspension at work; they are sharp, intrusive, and often alarming. Imagine the sound of two heavy metal objects striking one another—a distinct "clunk" or "knock." This sound is frequently heard when driving over bumps, potholes, or even minor road imperfections. The noise is produced when a worn-out ball joint or bushing allows for excessive movement. The metal components, which should be held firmly in place, are now free to shift and impact the steering knuckle or the vehicle's subframe.
Consider this scenario: as you turn into a driveway with a slight incline, you hear a loud "pop" from the front driver's side of the car. That pop is the sound of the lower ball joint, under the stress of turning and vertical suspension travel, suddenly shifting within its worn socket. Another common auditory clue is a groaning or creaking sound, especially at low speeds while turning the steering wheel or navigating a parking lot. This sound often points to a dried-out or deteriorated control arm bushing. The rubber, having lost its pliability, is now twisting and binding against its metal sleeve, creating a sound much like a creaky door hinge. The key to diagnosis is correlating the sound with a specific vehicle action. A clunk over a bump points to vertical impact wear, while a groan during a slow turn suggests rotational stress on a bushing.
The Tactile Feedback: Feeling Failure Through the Steering Wheel
Beyond what you hear, a failing left lower control arm car part communicates through what you feel, primarily through the steering wheel. The vehicle's steering system is directly connected to the suspension, and any looseness or "play" in the control arm will translate into a degradation of steering precision. One of the most telling signs is "steering wander." This is a sensation where the vehicle does not hold a straight line without constant minor corrections from the driver. You might find yourself perpetually adjusting the steering wheel on a seemingly flat, straight road just to keep the car centered in its lane. This wander is caused by a worn ball joint or bushings allowing the wheel's alignment angles, particularly camber and toe, to shift dynamically as you drive.
Another tactile symptom is a noticeable vibration in the steering wheel, especially at higher speeds. While wheel imbalance is a common cause of vibration, a worn lower ball joint can produce a similar effect. The excessive play in the joint prevents the wheel from rotating perfectly true, leading to a shimmy that is transmitted up the steering column. A more subtle but equally significant symptom is "memory steer." After making a turn, the steering wheel should naturally want to return to its center position. If a lower ball joint is excessively worn or beginning to seize, it can create resistance that prevents this self-centering action, forcing the driver to manually steer the car back to a straight path. This indicates a serious binding issue within the joint.
The Visual Inspection: A Detective's Guide to Bushings and Ball Joints
Often, a definitive diagnosis can be made with a careful visual inspection, provided you know what to look for. This requires safely raising the front of the vehicle and removing the wheel to gain a clear view of the suspension components. Your focus should be on the two control arm bushings—where the arm attaches to the vehicle's frame—and the lower ball joint, where the arm connects to the steering knuckle.
For the bushings, look for signs of severe cracking, tearing, or degradation in the rubber. In advanced stages of failure, you might see that the central metal sleeve has shifted significantly off-center within the rubber, or pieces of the rubber may be missing entirely. If the bushings are fluid-filled (common in many modern vehicles for improved damping), look for any evidence of dark, oily fluid that has leaked out and stained the control arm or subframe.
Next, turn your attention to the ball joint. Every ball joint is protected by a flexible rubber boot that holds lubricating grease in and keeps contaminants out. Inspect this boot carefully. If it is torn, ripped, or missing, the joint is compromised. Water and grit will have entered, washing out the grease and rapidly accelerating wear. You may even see rust or grease seeping from the damaged boot. The absence of a boot is a definitive sign that the ball joint, and therefore the entire left lower control arm car assembly (if the joint is integrated), requires replacement.
| Symptom Type | Specific Indicator | Likely Cause (in Control Arm) |
|---|---|---|
| Auditory | Sharp clunk or knock over bumps | Worn lower ball joint or frame-side bushing |
| Popping or snapping during turns | Excessive play in the lower ball joint socket | |
| Groaning or creaking at low speeds | Dried out or failed horizontal/vertical bushing | |
| Tactile | Steering wheel vibration at speed | Worn and loose lower ball joint |
| Vehicle "wanders" or pulls to one side | Failed bushings allowing alignment to shift | |
| Steering does not return to center easily | Seizing or binding lower ball joint | |
| Visual | Torn, leaking, or missing rubber boot | Ball joint failure is imminent or has occurred |
| Visible cracks or gaps in rubber bushings | Bushing failure, allowing excessive movement |
The Physical Examination: Using Leverage to Uncover Hidden Play
Sometimes, a visual inspection alone is not enough. A ball joint or bushing can be significantly worn without showing obvious external signs. This is where a physical test is necessary to reveal hidden looseness. With the vehicle's weight supported by a jack stand under the frame (allowing the suspension to hang freely), you can check for play in the lower ball joint. Grip the top and bottom of the tire and attempt to rock it inwards and outwards. There should be no discernible movement or clunking sound. Any play indicates wear in the ball joint.
For a more definitive test, use a long pry bar. Place the tip of the pry bar between the bottom of the steering knuckle and the left lower control arm, near the ball joint. Gently apply upward pressure to lift the knuckle slightly off the ball joint stud. As you apply and release pressure, watch and feel for any vertical movement or clunking in the ball joint. Even a millimeter of vertical play is a clear indication that the ball joint is worn beyond its service limit. You can perform a similar test on the bushings by placing the pry bar between the control arm and its mounting point on the subframe and prying gently. Any significant shift or clunking points to bushing failure. This physical confirmation removes all doubt and solidifies the diagnosis.
Differentiating the Culprits: Is It the Control Arm, Tie Rod, or Stabilizer Link?
A common pitfall in DIY diagnosis is attributing every front-end noise to the control arm. The front suspension is a system, and other components can produce similar sounds when they fail. It is vital to differentiate.
-
Extremidade do tirante: A worn outer tie rod end, which connects the steering rack to the steering knuckle, will typically cause a looser, less distinct clunking sound. The most definitive test is to have a helper rock the steering wheel back and forth slightly while you watch the tie rod end. You will see visible play or hear a clunk as the internal socket moves. A worn tie rod end also more directly impacts the "toe" alignment angle, often causing rapid, feathered wear on the inside or outside edge of the tire.
-
Link do estabilizador (Link da barra de balanço): The stabilizer link is a smaller rod that connects the end of the stabilizer bar to the suspension, often to the control arm or strut. Its small ball-and-socket joints are a very common source of noise. A worn stabilizer link typically produces a lighter, "rattling" or "clunking" sound over small, uneven bumps, almost like a handful of loose bolts. Because it primarily deals with body roll, the noise is often more pronounced when one wheel hits a bump independently of the other. You can often diagnose it by grabbing the link firmly and trying to move it; any play in its joints indicates failure.
Understanding these distinctions is paramount. Replacing a perfectly good left lower control arm car part when the true culprit was a simple stabilizer link is a frustrating and costly error. A methodical approach—listen, feel, look, and test—will lead you to the correct source of the problem.
| Component | Primary Function | Common Failure Sound | Key Diagnostic Test |
|---|---|---|---|
| Braço de controle inferior | Connects frame to knuckle, anchors wheel | Deep "clunk" over bumps, "pop" in turns | Pry bar test for vertical play at ball joint |
| Extremidade do tirante | Connects steering rack to knuckle | Looser clunk when turning steering wheel | Observe play while helper rocks steering wheel |
| Link do estabilizador | Connects stabilizer bar to suspension | Lighter "rattle" over small bumps | Grasp and shake the link to feel for looseness |
Choosing the Correct Replacement: A Guide to Materials, Design, and Quality
Once you have definitively diagnosed a faulty left lower control arm, the next phase of the journey begins: selecting a suitable replacement. This is not merely a matter of finding a part that looks similar to the one being removed. The market in 2025 offers a vast array of options, varying in material, design, brand reputation, and price. The choice you make will have a direct and lasting impact on your vehicle's future performance, segurança, and ride comfort. A well-informed decision is an investment in the vehicle's longevity, while a poor one can lead to premature failure, compromised handling, and the frustrating experience of repeating the repair. This selection process requires a thoughtful examination of the differences between original equipment and aftermarket parts, an understanding of the material science behind control arm construction, and an appreciation for the quality of integrated components like bushings and ball joints.
The Philosophical Divide: Original Equipment (OEM) versus Aftermarket Parts
The first major decision point is whether to purchase an Original Equipment Manufacturer (OEM) part or an aftermarket equivalent. An OEM part is identical to the one the vehicle was fitted with at the factory, produced by or for the car manufacturer. An aftermarket part is produced by a different company and is designed to function as a replacement for the OEM part.
OEM parts offer the peace of mind of a guaranteed fit and an assurance of meeting the original performance specifications. The car manufacturer has invested millions in research and development to engineer that specific part for that specific vehicle. As noted in discussions about dealership service, using OEM parts is a key advantage that dealerships highlight, as it ensures compatibility and maintains the vehicle's original engineering intent (tvi-mp3.com). The downside is typically cost; OEM parts are almost always the most expensive option.
Aftermarket parts, on the other hand, exist on a wide spectrum of quality and price. Reputable aftermarket brands, such as those found at a dedicated braço de controle de suspensão supplier, often produce parts that meet or even exceed OEM specifications. These companies may identify a weakness in the original design and improve upon it—for example, by using a more durable bushing material or offering a serviceable (greasable) ball joint instead of a sealed OEM unit. The primary appeal of the aftermarket is the balance of quality and value, offering a reliable repair at a more accessible price point. No entanto, the market is also flooded with low-cost, low-quality parts that may be dimensionally inaccurate, use inferior materials, and fail prematurely. The key is to source parts from a trusted vendor who curates their inventory and stands behind the quality of their products.
A Study in Materials: Stamped Steel, Cast Iron, and Forged Aluminum
The material from which a control arm is made is fundamental to its strength, peso, and cost. The three most common materials are stamped steel, cast iron, and forged aluminum.
-
Stamped Steel: This is the most common and cost-effective construction method. It involves stamping multiple pieces of sheet steel into shape and then welding them together to form the arm. Stamped steel arms offer a good balance of strength and weight for most passenger cars and light SUVs. Their primary vulnerability is rust. If the protective coating is compromised, corrosion can weaken the welds or the steel itself over time, especially in regions that use road salt in winter. When choosing a stamped steel replacement, pay close attention to the quality of the welds and the thickness and durability of the protective E-coating or paint.
-
Cast Iron: For heavy-duty applications like trucks and large SUVs, cast iron is often the material of choice. The process involves pouring molten iron into a mold to form a single, solid piece. Cast iron control arms are incredibly strong and durable, capable of withstanding immense loads. Their main drawback is weight. This "unsprung weight" (weight not supported by the springs) can have a minor negative effect on ride quality and handling responsiveness. Cast iron is also more brittle than steel and, while unlikely, can crack under extreme impact.
-
Forged Aluminum: Found on many modern performance and luxury vehicles, forged aluminum arms represent the high-end of the spectrum. Forging involves taking a solid billet of aluminum and shaping it under extreme pressure. This process aligns the grain structure of the metal, resulting in a part that is both incredibly strong and significantly lighter than its steel or iron counterparts. The reduction in unsprung weight enhances suspension responsiveness, leading to improved handling and ride comfort. The main disadvantages of forged aluminum are its high cost and its susceptibility to damage from impact with curbs or large potholes.
Your vehicle was designed with one of these material types in mind. While it is sometimes possible to "upgrade" (e.g., from stamped steel to aluminum), it is generally wisest to replace the arm with one made from the same material as the original to maintain the vehicle's designed suspension dynamics.
The Soul of the Arm: Understanding Bushing Composition and Performance
The control arm itself is a simple lever, but its bushings are the silent, compliant heart of the assembly. These rubber or polyurethane cylinders isolate the cabin from road noise and vibration while precisely controlling the movement of the arm. The quality of the bushings in a replacement left lower control arm car part is just as important as the arm itself.
-
Rubber Bushings: The vast majority of OEM and standard aftermarket control arms use rubber bushings. Modern automotive rubber is a sophisticated synthetic compound designed for a specific balance of durability, flexibility, and vibration damping. Some advanced designs are "hydro-bushings," which are fluid-filled to provide superior damping characteristics across a range of frequencies. The main advantage of rubber is its ability to absorb noise and harshness, providing a comfortable ride. Its weakness is susceptibility to age, heat, and oil contamination, which can cause it to dry out, crack, and fail.
-
Polyurethane Bushings: For drivers seeking enhanced performance and durability, polyurethane (often called "poly") bushings are a popular upgrade. Polyurethane is a much firmer material than rubber and is highly resistant to oil, chemicals, and degradation. This firmness results in more precise and responsive handling, as there is less deflection in the suspension geometry under cornering loads. The trade-off is a noticeable increase in the transmission of noise, vibration, and harshness (NVH) into the cabin. A car with full polyurethane suspension can feel much more connected to the road, but it will also be a louder and rougher ride. For a daily-driven vehicle, high-quality rubber bushings often provide the best overall balance.
The Integrated Ball Joint: A Point of Articulation and a Common Failure Point
In most modern front suspension designs, the lower ball joint is integrated into the control arm. It is not a separately replaceable part. This means that when the ball joint fails, the entire control arm assembly must be replaced. The quality of this integrated ball joint is therefore a paramount consideration when selecting a replacement part.
A high-quality ball joint will feature a hardened, highly polished ball stud and a durable, low-friction polymer bearing (like Delrin). This ensures smooth articulation and a long service life. Cheaper units may use softer metal and lower-grade plastic bearings that wear out quickly, leading to the return of the clunking noises you just worked to eliminate. Some premium aftermarket control arms feature an improved ball joint design, such as a "greasable" or serviceable joint. These have a Zerk fitting that allows you to periodically inject fresh grease, flushing out contaminants and extending the joint's life significantly. This is a valuable feature, especially for vehicles operated in harsh conditions. When examining a potential replacement, look for a robust ball joint boot made from high-quality neoprene or silicone, as this is the first line of defense against contamination.
Navigating the Market: How to Verify Fitment for Your Specific Vehicle in 2025
Vehicle manufacturers often make mid-year changes to suspension components. A 2025 model built in January may have a different control arm than one built in July. Using the Vehicle Identification Number (VIN) is the most reliable way to ensure you are purchasing the correct part. Reputable online suppliers provide tools to verify fitment using your VIN or by selecting your vehicle's precise year, make, modelo, and sub-model. A company that has been in the business for a long time, as detailed on their about us page, will likely have the robust cataloging systems needed for this accuracy. Double-check details like the material (steel vs. aluminum) and the design of the ball joint taper. Rushing this step can lead to receiving a part that simply will not fit, causing significant delays and frustration.
The Preparatory Phase: Setting the Stage for a Successful Repair
Approaching a significant automotive repair like replacing a left lower control arm car component is much like preparing for a surgical procedure. The success of the operation is determined not only by the skill applied during the main event but also by the meticulous preparation that precedes it. A well-prepared workspace, the correct assortment of tools, and a strict adherence to safety protocols are not preliminary formalities; they are integral parts of the job itself. Rushing this phase is a common mistake that can lead to stripped bolts, damaged components, personal injury, and a simple job turning into a multi-day ordeal. By dedicating time and attention to preparation, you create an environment of safety, efficiency, and control, setting the stage for a smooth and successful replacement.
The Sanctity of Safety: Essential Precautions Before You Begin
There is no component or repair worth compromising your personal safety. The forces involved in a vehicle's suspension are immense, and the vehicle's weight is lethal if not properly managed. The single most important rule is to never work under a vehicle supported only by a jack. Jacks are for lifting, not for supporting.
- Stable Ground: Begin by parking the vehicle on a hard, level surface like a concrete garage floor or driveway. Never attempt this work on soft ground like grass, dirt, or asphalt on a hot day, as the jack stands can sink.
- Secure the Vehicle: Engage the parking brake firmly and place wheel chocks behind the rear wheels to prevent the vehicle from rolling.
- Proper Lifting: Consult your owner's manual to identify the correct factory lift points on the vehicle's frame. Using the wrong point can damage the vehicle or create an unstable lift. Use a quality hydraulic floor jack to raise the front of the vehicle.
- Use Jack Stands: Once the vehicle is raised to a sufficient height to allow the front wheel to be removed and provide working space, place a pair of appropriately rated jack stands under the designated support points on the frame or subframe. Slowly lower the vehicle until its weight is resting entirely on the jack stands. Give the vehicle a firm shove to ensure it is stable and will not shift. The jack can be left in place as a backup, but it should not be bearing the load.
- Personal Protective Equipment (PPE): Always wear safety glasses or goggles. Springs can be under tension, rust can flake off into your eyes, and tools can slip. A good pair of mechanic's gloves will protect your hands from cuts, scrapes, and grime.
Assembling Your Arsenal: The Comprehensive Tool and Equipment List
Walking back and forth to your toolbox for a forgotten socket is inefficient and breaks your concentration. Before you even loosen the first bolt, assemble every tool you will need. While the exact sizes will vary by vehicle, a typical lower control arm replacement requires a fairly standard set of tools.
Basic Hand Tools:
- A comprehensive socket set in both metric and standard sizes (depending on your vehicle), with 3/8-inch and 1/2-inch drive ratchets. You will likely need deep and shallow sockets.
- A set of combination wrenches.
- A breaker bar (1/2-inch drive is standard) for loosening stubborn, high-torque bolts.
- A reliable torque wrench. This is not an optional tool. Control arm bolts are safety-critical and must be tightened to the manufacturer's precise specification. Both click-type and beam-type wrenches are acceptable, but they must be accurate.
Specialty Tools:
- Ball Joint Separator: This is perhaps the most important specialty tool. The tapered stud of the ball joint becomes wedged very tightly into the steering knuckle. Simply hammering on it is a bad idea, as it can damage the knuckle or other components. Several types of separators are available:
- Pickle Fork: A simple, wedge-shaped tool that is driven between the knuckle and control arm. It is effective but almost always destroys the ball joint's rubber boot, making it suitable only when you are replacing the arm anyway.
- Scissor or Clamp-Style Separator: A more controlled tool that uses a bolt to apply steady pressure and "press" the ball joint stud out of the knuckle without impact. This is the preferred method.
- Large Pry Bars: Essential for nudging the suspension into place and for testing for play during diagnosis.
- A Heavy Hammer or Mallet: Sometimes, a sharp, authoritative strike on the side of the steering knuckle (right where the ball joint stud passes through) is enough to shock the tapered connection loose. Never strike the stud itself.
The Power of Penetrating Oil: Winning the Battle Against Rust and Corrosion
The underside of a vehicle is a harsh environment. Bolts are exposed to water, salt, and grime, leading to significant rust and corrosion. Attempting to remove a 15-year-old control arm bolt with brute force alone is a recipe for a sheared bolt head, which turns a two-hour job into a weekend-long nightmare of drilling and tapping.
Your secret weapon is penetrating oil. At least a few hours—or even better, the day before—generously spray every nut and bolt you intend to remove. This includes the main control arm mounting bolts, the ball joint nut, and the stabilizer link connections. The oil will slowly wick its way into the threads, breaking down rust and easing removal. Reapply it just before you begin work. This single, simple step can be the difference between a smooth disassembly and a major setback. For particularly stubborn bolts, a small amount of heat from a propane torch can also help by causing the metal to expand, but this should be done with extreme caution, keeping the flame away from rubber bushings, fuel lines, and the ball joint boot.
Staging the Operation: Preparing the Vehicle and Organizing Your Parts
With the vehicle safely supported and your tools at the ready, the final preparatory step is to stage the workspace. Remove the front wheel and set it aside. This is also a good time to turn the steering wheel to one side or the other to improve access to the control arm bolts or the ball joint nut. Por exemplo, to work on the left lower control arm, turning the steering wheel all the way to the right may expose the rear of the knuckle.
Unbox your new left lower control arm car part. Compare it directly to the one on the vehicle. Are the mounting points in the same location? Is the ball joint stud the same taper and length? Does it have the same provisions for attaching the stabilizer link or other brackets? Verifying this now prevents you from completing half the disassembly only to discover you have the wrong part. Keep all new hardware, like cotter pins or nuts that came with the new arm, organized in a magnetic tray or container so they don't get lost. A little organization at the beginning pays huge dividends in efficiency and reduced stress during the core of the work. This commitment to quality and process is often a hallmark of a company that is proud of its history and expertise.
The Surgical Procedure: A Methodical Guide to Replacing the Left Lower Control Arm
With the vehicle secure, the tools laid out, and the new part verified, the time has come to perform the replacement. This process demands a sequence of deliberate actions. Each bolt removed and each connection separated is a step that must be done with an understanding of its function and the potential pitfalls. Think of yourself not as a brute-force mechanic, but as a surgeon making precise incisions to remove a faulty component while preserving the health of the surrounding system. The goal is a clean extraction and a perfect installation, ensuring the new arm integrates seamlessly into the complex anatomy of the suspension. A patient, step-by-step approach is the surest path to success.
The Initial Disassembly: Gaining Access to the Arm
The first steps involve clearing a path to the left lower control arm itself. While not always strictly necessary, removing the brake caliper and rotor can provide significantly more working room and prevent accidental damage to the brake hose.
- Remove the Brake Caliper: Locate the two caliper mounting bolts on the back of the steering knuckle. Loosen and remove them. Do not allow the caliper to hang by its brake hose, as this can cause internal damage. Use a caliper hanger or a piece of wire to suspend it from the coil spring or another sturdy point.
- Remove the Caliper Bracket and Rotor: If the caliper bracket is separate, remove its mounting bolts and set it aside with the caliper. The brake rotor should now slide off the wheel hub. If it is stuck due to rust, a few solid taps with a mallet on the hub-facing side can help break it loose.
This initial clearing of components gives you an unobstructed view and much better access to the core connections you need to address next: the stabilizer link, the outer tie rod end, and the all-important lower ball joint.
Freeing the Connections: Disconnecting the Stabilizer Link and Tie Rod End
The control arm is part of an interconnected system. To remove it, you must first detach the other components that are attached to it or are in the way.
-
Link do estabilizador: The stabilizer link is often connected directly to the control arm. It will typically have a nut on both the top and bottom. You will likely need to use a wrench on the nut and an Allen key or another wrench on the stud itself to keep it from spinning. Remove the nut connecting the link to the control arm. If you are only disconnecting the bottom, you may be able to swing the link up and out of the way. Given their low cost and high failure rate, it's often wise to replace the stabilizer links at the same time as the control arms.
-
Outer Tie Rod End: While you don't need to remove the tie rod end from the tie rod, you do need to separate it from the steering knuckle to allow the knuckle to move freely. Loosen the nut on the tie rod end's stud but do not remove it completely. Leave it on by a few threads. Now, give the side of the steering knuckle a few sharp, powerful blows with a heavy hammer. This shock will often pop the tapered stud free. The nut you left on will prevent the tie rod from falling away violently. Once it's loose, you can remove the nut and separate the tie rod end from the knuckle.
The Art of Separation: Releasing the Lower Ball Joint from the Steering Knuckle
This is often the most challenging step of the entire process. The tapered steel stud of the ball joint is pressed into a matching tapered hole in the steering knuckle, creating an incredibly strong friction fit.
- Remove the Nut: First, remove the large castellated nut or nylon lock nut from the bottom of the ball joint stud. If there is a cotter pin, remove it first.
- Apply a Separator: Use your chosen ball joint separator. If using a scissor-style press, position it with one jaw on the top of the control arm (or the knuckle) and the forcing screw on the bottom of the ball joint stud. Tighten the screw until the separator is under significant tension.
- Add Shock: If tightening the separator alone doesn't pop the joint loose, leave the tension on the tool and strike the side of the steering knuckle forcefully with your hammer as you did for the tie rod end. The combination of steady pressure from the separator and the sharp shock from the hammer is almost always effective. It will release with a loud "BANG."
- The "Pickle Fork" Method: If you are using a pickle fork, drive it between the control arm and the knuckle. This will force them apart but will tear the ball joint boot. Since you are replacing the entire left lower control arm car assembly, this damage is irrelevant.
Once the ball joint is free from the knuckle, the entire knuckle/hub/strut assembly can be pushed aside, giving you clear access to the final mounting bolts.
Unbolting the Core: Removing the Control Arm from the Vehicle's Frame
The left lower control arm is typically held to the vehicle's subframe or unibody frame by two large bolts, one passing through a horizontal bushing at the front and another through a vertical bushing at the rear. These bolts are installed with very high torque and are often seized by rust.
- Apply Force: Using your long breaker bar and the correct size socket, carefully break these bolts loose. Ensure the socket is fully seated on the bolt head to avoid rounding it off. You may need to use a piece of pipe on the end of the breaker bar for extra leverage.
- Mind the Alignment Cams: Pay close attention to the mounting bolts. On many vehicles, these bolts use eccentric cams or washers that are used to set the vehicle's wheel alignment (specifically camber and caster). It is a good practice to mark the position of these cams relative to the frame before you loosen them. Use a paint marker or a scribe to make a clear witness mark. This will allow you to get the alignment "close enough" upon reassembly to safely drive the car to an alignment shop.
- Remove the Arm: Once the bolts are removed, the old control arm should be free. It may require some wiggling and prying to extract it from its mounting brackets, but it should come out without too much difficulty.
The Installation Dance: Positioning and Fastening the New Left Lower Control Arm
Installation is, for the most part, the reverse of removal, but with a few critical considerations.
- Position the New Arm: Maneuver the new control arm into its mounting brackets on the subframe.
- Install Frame Bolts Loosely: Insert the two main frame bolts. If your vehicle uses alignment cams, try to line them up with the marks you made earlier. Thread the nuts on but leave them loose enough that the control arm can still pivot up and down freely. This is the single most important detail of the installation process.
- Connect the Ball Joint: Swing the steering knuckle back into position and guide the new ball joint stud up through the hole in the bottom of the knuckle. Install the new nut provided with the arm and tighten it to the manufacturer's specified torque. If it's a castellated nut, tighten it to the minimum torque, then continue tightening only as much as needed to align the slot in the nut with the hole in the stud for the new cotter pin. Install the new cotter pin and bend the tabs to secure it.
- Reconnect Other Components: Reattach the outer tie rod end to the knuckle and torque its nut. Reconnect the stabilizer link to the new control arm and tighten its fastening nut.
The Principle of Preloading: Why You Must Torque Bushings at Ride Height
You must not tighten the main control arm bushing bolts while the suspension is hanging in the air. The rubber bushings are designed to sit in a neutral position when the car is on the ground at its normal ride height. If you tighten the bolts with the suspension fully extended, the rubber bushings will be in a constant state of pre-loaded twist once the car is on the ground. This will cause them to fail in a matter of weeks or months, leading to a return of your original problems.
To do this correctly, you must "load" the suspension before the final torque is applied.
- Support the Arm: Place your floor jack under the new left lower control arm, near the ball joint.
- Simulate Ride Height: Slowly raise the jack, compressing the suspension until the vehicle just begins to lift off the jack stand. This approximates the normal ride height position.
- Apply Final Torque: With the suspension compressed and the bushings in their neutral state, now you can use your torque wrench to tighten the two main control arm frame bolts to the exact specification listed in your vehicle's service manual.
Once the final torque is applied, you can lower the jack, reinstall the brake rotor and caliper (torquing the caliper bolts correctly), and mount the wheel.
Post-Installation Protocol: Ensuring Longevity and Performance
The physical act of replacing the left lower control arm car part is complete, but the job is not yet finished. The final phase of the process involves a series of verification steps and follow-up actions that are essential for validating the repair, ensuring the safety of the vehicle, and maximizing the lifespan of the new component. Skipping these post-installation rituals is like a surgeon sending a patient home without scheduling a follow-up appointment; it leaves the long-term success of the procedure to chance. These steps, particularly the wheel alignment, are not optional recommendations but fundamental requirements for restoring the vehicle's designed handling characteristics and safety.
The Absolute Necessity of Wheel Alignment
This is the most critical post-replacement step and it is non-negotiable. Replacing a lower control arm fundamentally alters the vehicle's suspension geometry. Even if you meticulously marked the position of the alignment cams, you have only achieved a rough approximation of the correct settings. The three primary alignment angles—camber, caster, and toe—are all affected.
- Camber: This is the inward or outward tilt of the top of the tire when viewed from the front. The lower control arm is the primary determinant of the camber angle. An incorrect camber angle will cause the tire to wear unevenly on its inner or outer shoulder.
- Caster: This is the forward or rearward tilt of the steering axis. Caster affects steering stability and the steering wheel's ability to self-center after a turn. The fore-aft position of the lower control arm directly influences caster.
- Toe: This is the direction the tires are pointing relative to each other, like looking down at your own feet. While the tie rods are the primary adjustment for toe, changing the control arm's position (which affects camber and caster) will have a secondary effect on the toe setting.
Driving a vehicle with improper alignment is not only unsafe, leading to unpredictable handling and pulling, but it will also rapidly destroy your tires. A brand-new set of tires can be ruined in just a few thousand miles. You must take the vehicle to a qualified shop with a modern laser alignment rack to have a professional four-wheel alignment performed. Think of the cost of the alignment not as an extra expense, but as the final, required cost of the control arm replacement itself. It protects your investment in the new parts and your tires.
The Post-Operative Test Drive: Listening and Feeling for Success
After the alignment is complete, perform a thorough test drive. This is your opportunity to confirm that the original problem has been resolved and that no new issues have been introduced.
- Find a Safe Environment: Choose a quiet road or an empty parking lot where you can focus on the vehicle's behavior without the distraction of heavy traffic.
- Listen Carefully: Drive over the same types of bumps and make the same types of turns that previously produced the clunking or popping noises. The front end should now be silent, with only the muted, solid sound of a healthy suspension at work. Listen for any new squeaks, groans, or rattles that might indicate a loose bolt or a component that is rubbing.
- Feel the Steering: Pay close attention to the steering wheel. It should feel tight and responsive. The "wander" should be gone, and the car should track straight and true. After making a 90-degree turn, the steering wheel should smoothly and consistently return to the center on its own.
- Test the Brakes: Apply the brakes moderately at various speeds to ensure the brake caliper and rotor were reinstalled correctly and are functioning normally. There should be no pulsations or noises from the brakes.
This test drive is your final quality control check. It provides the sensory confirmation that the mechanical work has translated into a tangible improvement in the vehicle's performance and comfort.
A Final Check: Retorquing Fasteners After a Break-In Period
While modern fasteners and torque procedures are very reliable, it is a professional best practice to re-check the torque on critical fasteners after a short break-in period. After driving for approximately 50 para 100 milhas (or 80 para 160 kilometers), find a safe opportunity to raise the vehicle again and put a torque wrench on the key bolts you replaced.
Focus on the two main control arm-to-frame bolts and the lower ball joint nut. Do not loosen them; simply set your torque wrench to the specified value and verify that the bolt does not turn before the wrench clicks. This check ensures that nothing has settled or shifted in a way that would reduce the clamping force of the bolts. It is a quick step that provides an extra layer of confidence and safety, confirming that the repair will remain secure for the long term. This level of thoroughness is what separates a simple parts-swapper from a true technician, a sentiment echoed by experts who emphasize that comprehensive documentation and follow-up are key to customer confidence and retention (tvi-mp3.com).
Understanding the Broader System: How One Replacement Affects Other Components
Replacing the left lower control arm does not happen in a vacuum. It's an opportunity to consider the health of the entire suspension system. The new, tight control arm will now transfer forces differently than the old, worn one. This can sometimes expose a weakness in another, older component. Por exemplo, a worn strut or a failing control arm on the opposite side of the vehicle may become more noticeable now that one side is new and firm.
During the repair, you should have taken the opportunity to inspect the other nearby parts. How did the outer tie rod end feel? Was the stabilizer link tight? Did you notice any cracking on the axle boot or leaking from the strut? Addressing these issues proactively, or at least being aware of them, is part of a holistic approach to vehicle maintenance. Consistent evaluation and timely replacement of related accessories like belts and hoses are known to reduce the likelihood of more costly future repairs (freewayford.net). By viewing the replacement of the left lower control arm car part as one part of maintaining a complex system, you move from a reactive to a proactive mindset, ensuring the continued safety and reliability of your vehicle for years to come. This approach is fundamental to the philosophy of a reliable auto parts supplier like Forward Auto Parts, which seeks to empower customers with knowledge, not just sell them components.
Frequently Asked Questions (FAQ)
What is the primary function of a left lower control arm in a car? The left lower control arm is a critical suspension component that connects the vehicle's frame to the steering knuckle, which holds the wheel. It acts as a pivot point, allowing the wheel to move up and down with the road surface while maintaining the vehicle's alignment and stability.
How long can I expect a replacement lower control arm to last? The lifespan of a replacement control arm depends heavily on its quality, the driving conditions, and the vehicle. A high-quality OEM or premium aftermarket control arm can last 80,000 para 100,000 miles or more. Lower-quality parts may fail in as little as 20,000 milhas. Driving on poorly maintained roads with many potholes will shorten its life.
Is it safe to drive my car with a bad lower control arm? Driving with a severely worn lower control arm is not recommended and can be dangerous. A worn ball joint or bushings can cause loss of steering control, unpredictable handling, and excessive tire wear. In a worst-case scenario, a complete failure of the ball joint can cause the wheel to separate from the suspension, leading to a total loss of control.
Should I replace both the left and right control arms at the same time? While not always strictly necessary, it is highly recommended. Suspension components on both sides of a vehicle experience similar wear over time. If the left lower control arm has failed due to age or mileage, the right one is likely not far behind. Replacing them in pairs ensures balanced handling and saves you from having to perform the same job twice in the near future.
What is the average cost to replace a left lower control arm? As of 2025, the cost can vary significantly. The part itself can range from under one hundred dollars for a basic aftermarket arm to several hundred dollars for an OEM or high-performance aluminum arm. Professional labor can add another two to four hundred dollars, depending on the vehicle's complexity and local labor rates. A professional wheel alignment, which is mandatory after the repair, will add to the total cost.
What is the difference between a control arm and a tie rod? A control arm manages the vertical movement of the wheel and anchors its position relative to the car's body. A tie rod is part of the steering system; it connects the steering rack to the wheel's knuckle and is responsible for turning the wheel left and right when you move the steering wheel.
Can I perform a wheel alignment myself after replacing the control arm? Não, a proper wheel alignment requires specialized, expensive laser-guided equipment to accurately measure and adjust the camber, caster, and toe angles to within fractions of a degree. It is a job that must be performed by a professional alignment technician.
Conclusion
The left lower control arm, though hidden from view, functions as a linchpin of your vehicle's stability and directional control. Its health is directly tied to your safety and the quality of your driving experience. The journey from identifying a subtle clunk to feeling the solid, responsive handling after a successful repair is an empowering one. It transforms the driver from a passive operator into an engaged and knowledgeable custodian of their machine. This process requires more than just mechanical aptitude; it demands a methodical diagnostic process, an informed selection of quality components, and a disciplined, safety-conscious approach to the replacement procedure itself. The final, crucial step of a professional wheel alignment is not an afterthought but the act that solidifies the repair, ensuring that the new mechanical integrity translates into precise, predictable performance on the road. By embracing this comprehensive understanding, you not only restore a single part but reaffirm the safety and reliability of the entire vehicle.
References
FasterCapital. (2024). Assessing outbound logistics and value chain enhancement. FasterCapital. https://fastercapital.com/topics/assessing-outbound-logistics-and-value-chain-enhancement.html
Freeway Ford. (2025). Ford auto service overview. Freeway Ford. https://www.freewayford.net/what-is-an-auto-service.html
Gillespie, T. D. (1992). Fundamentals of vehicle dynamics. Society of Automotive Engineers.
Global Auto Parts. (2025). FAQs. Global Auto Parts. https://www.globalautoparts.biz/faqs/
TVI MarketPro3. (2024a). Dealership profits with mobile service solutions. TVI MarketPro3. https://www.tvi-mp3.com/blog/insights/dealership-profits-with-mobile-service-solutions/
TVI MarketPro3. (2024b). Sales funnels for dealership service departments. TVI MarketPro3. https://www.tvi-mp3.com/blog/insights/sales-funnels-for-dealership-service-departments/
TVI MarketPro3. (2025a). Strategies for service drive success in 2025. TVI MarketPro3. https://www.tvi-mp3.com/blog/strategies-for-service-drive-success-in-2025/
TVI MarketPro3. (2025b). Technicians’ impact on dealership retention: The secret to long-term success. TVI MarketPro3. https://www.tvi-mp3.com/blog/insights/technicians-impact-on-dealership-retention/