
Abstrak
The stabilizer bar link, a component of a vehicle's suspension system, plays a fundamental role in managing vehicle stability and handling, particularly during cornering maneuvers. It connects the anti-roll bar, atau bar bergoyang, to a suspension member, seperti lengan kawalan atau tali. The effective functioning of this component is integral to mitigating body roll, which enhances tire contact with the road surface and contributes to a safer, more controlled driving experience. Failure of a stabilizer link can manifest through a range of symptoms, including audible clunking or rattling sounds, degraded steering response, and excessive vehicle lean in turns. This analysis examines five common and potentially costly mistakes made during the replacement process: misdiagnosis of the initial problem, selection of inappropriate replacement parts, improper installation techniques, neglect of adjacent suspension components, and omission of post-installation verification. By providing a detailed exploration of these pitfalls, this guide aims to equip both automotive enthusiasts and professional technicians with the knowledge required to perform a correct and durable repair, thereby restoring vehicle dynamics and ensuring long-term reliability.
Takeaways utama
- Properly diagnose suspension noises to avoid replacing the wrong part.
- Select high-quality replacement parts that match OEM specifications for longevity.
- Always load the suspension correctly before torquing the new stabilizer bar link.
- Inspect adjacent components like bushings and control arms during replacement.
- Perform a post-installation test drive and re-torque fasteners after a break-in period.
- Never ignore symptoms like poor handling, as they can indicate a failing link.
- A thorough visual inspection can often reveal damage before complete failure.
Jadual Kandungan
- Introduction to the Unsung Hero: Understanding the Stabilizer Bar Link
- Mistake #1: Misdiagnosing the Problem
- Mistake #2: Choosing the Wrong Replacement Part
- Mistake #3: Improper Installation Technique
- Mistake #4: Ignoring Surrounding Components
- Mistake #5: Neglecting Post-Installation Checks and Long-Term Maintenance
- Soalan yang sering ditanya (Soalan Lazim)
- Kesimpulan
- Rujukan
Introduction to the Unsung Hero: Understanding the Stabilizer Bar Link
Imagine for a moment that you are a tightrope walker. To maintain your balance high above the ground, you carry a long, weighted pole. When you start to tip to one side, you instinctively adjust the pole, using its weight to counteract the lean and bring yourself back to a stable center. In a surprisingly similar fashion, your vehicle's suspension system has its own version of this balancing pole: the stabilizer bar, often called an anti-roll or sway bar. Walau bagaimanapun, this bar cannot function in isolation. It requires a connection to the wheels to do its job, and that connection is made by a component that is often overlooked yet profoundly significant: pautan bar penstabil.
What is a Stabilizer Bar and Why Does It Matter?
Before we can appreciate the link, we must first understand the bar it serves. The stabilizer bar is a simple, U-shaped piece of steel, a type of torsion spring, that connects the left and right suspension systems of a vehicle. Its purpose is elegantly straightforward. When you drive straight on a level road, the bar does very little; it simply rotates with the suspension as both wheels move up and down together.
The magic happens when you enter a turn. As you steer, centrifugal force pushes the body of your car outwards, causing it to "roll" or lean. The wheel on the outside of the turn is pushed down as the suspension compresses, while the wheel on the inside of the turn lifts up as its suspension extends. The stabilizer bar resists this twisting motion. As the outer suspension arm moves up, it twists the bar, which in turn tries to lift the inner suspension arm. This action counteracts the body roll, keeping the vehicle flatter and more stable through the corner. A flatter vehicle keeps its tires more evenly planted on the pavement, which translates directly into better grip, more predictable handling, and a greater sense of safety for the driver. Tanpa itu, cornering would feel vague, uncontrolled, and far less secure.
The Role of the Stabilizer Bar Link: The Critical Connection
If the stabilizer bar is the balancing pole, the stabilizer bar link is the tightrope walker's arms holding it. These links are the crucial intermediaries that transmit the forces from the suspension arms to the ends of the stabilizer bar. Typically, one is found at each end of the stabilizer bar, connecting it to a lower control arm, strut housing, or steering knuckle. They are, Intinya, the communicators in this system. When the wheel on one side moves up or down relative to the body, the link pushes or pulls on the end of the stabilizer bar, causing it to twist and engage.
Without a functional stabilizer bar link, the stabilizer bar itself is rendered useless. A broken or disconnected link means the bar is no longer tied to the suspension on that side. The balancing mechanism is broken. The result is a sudden increase in body roll, a feeling of looseness in the steering, and often, a chorus of unsettling noises as the disconnected parts knock against each other (uchanics.ca, 2023). The integrity of this small part is therefore directly tied to the vehicle's dynamic behavior and the driver's ability to maintain control.
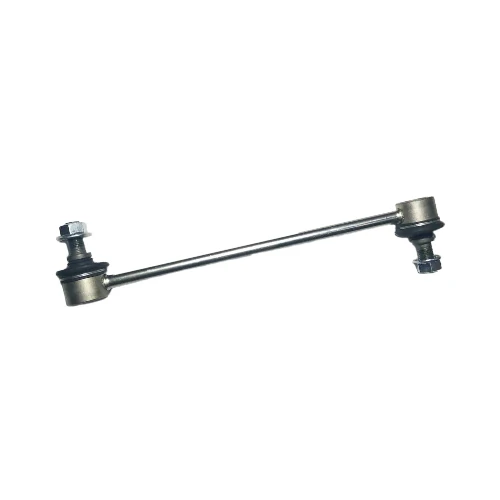
Anatomy of a Stabilizer Link: A Closer Look at its Components
At first glance, a stabilizer link appears to be a simple rod with connection points at each end. Walau bagaimanapun, its design is a thoughtful piece of engineering meant to accommodate complex movements. Most modern links consist of a central rod, which can be made of steel, aluminium, or even composite materials. At each end, you will typically find a small ball joint or a rubber or polyurethane bushing.
The ball joints are particularly clever. Much like the ball-and-socket joint in your shoulder, they allow for movement in multiple directions. As the suspension travels up and down and the wheel turns left and right, the ball joints on the stabilizer link pivot smoothly, preventing the link from binding or breaking. These joints are usually sealed in a protective rubber boot filled with grease to keep them lubricated and free of contaminants like water and grit.
Dalam beberapa reka bentuk, particularly on older vehicles or in certain rear suspension setups, you might find bushings instead of ball joints. These are firm-yet-flexible rubber or polyurethane cylinders that allow for a more limited range of twisting motion. Regardless of the specific design—ball joints or bushings—the purpose is the same: to provide a firm connection that can still articulate with the dynamic, multi-axis movement of a modern suspension system. Understanding this anatomy is the first step toward diagnosing issues and appreciating why a failure in one of its small parts can have such a noticeable effect on the entire vehicle.
Mistake #1: Misdiagnosing the Problem
One of the most frequent and frustrating experiences for any vehicle owner or technician begins with a sound—a mysterious clunk, rattle, or knock that seems to emanate from the depths of the vehicle's undercarriage. The immediate temptation is to jump to a conclusion. Because failing stabilizer bar links are a common source of such noises, they are often the first suspect. Walau bagaimanapun, replacing a part based on a sonic symptom alone, without a thorough and systematic diagnosis, is a significant error. It can lead to wasted money on unneeded parts and wasted time on a repair that fails to solve the root problem, all while the true culprit continues to wear, potentially leading to a more severe failure down the road.
The Symphony of Suspension Noises: Distinguishing a Bad Link from Other Issues
The suspension system is a complex orchestra of interconnected parts, and many of them can produce similar sounds when they begin to fail. Learning to distinguish these sounds is a skill, an act of careful listening that can guide you toward an accurate diagnosis.
A failing stabilizer bar link typically produces a sharp, distinct "clunk" or "rattle." This sound is most pronounced when driving at low speeds over uneven surfaces, such as bumpy roads, kelajuan lebam, or driveway entrances. You might notice it most when only one wheel hits a bump, causing the two sides of the suspension to move unevenly and making the loose link knock against its mounting points. Another classic sign is a clunking noise during initial turn-in, as the body starts to roll and puts pressure on the link.
How does this differ from other common suspension noises?
- Worn Ball Joints (on a control arm): A failing lower ball joint often creates a deeper, heavier "thud" or a creaking sound, especially when going over larger bumps or when turning the steering wheel. It can feel like the bottom of the car is loose.
- Bad Tie Rod Ends: Worn tie rod ends, which are part of the steering system, tend to cause a clunk that can be felt through the steering wheel. The steering may feel loose or have excessive play, and the noise is often most apparent during sharp, low-speed turns.
- Failing Struts or Shocks: Worn-out struts or shock absorbers lead to a bouncier, less controlled ride. The noise they make is often a hollow or knocking sound as the internal valving fails, and you may also hear the coil spring shifting or binding.
- Worn Control Arm Bushings: Deteriorated rubber bushings on a suspension control arm often produce a groaning or creaking sound, especially in cold weather or when going over speed bumps. It's a lower-pitched, more sustained noise than the sharp clack of a stabilizer link.
To practice distinguishing these, try a mental exercise. The next time you are in your vehicle, find a quiet street and turn off the radio. Drive slowly over a small bump. Is the noise a high-pitched rattle or a low-pitched groan? Does it happen when the wheel hits the bump, or as it comes down? Does turning the wheel change the sound? This active listening process is the first step in becoming an effective diagnostician.
Beyond the Sounds: Physical Symptoms of a Failing Stabilizer Link
While sound is a primary indicator, it should be corroborated with physical, tangible symptoms. A compromised stabilizer link directly impacts the vehicle's handling dynamics. One of the most noticeable effects is an increase in body roll during cornering. The car will feel more "tippy" or less planted when navigating turns, as the stabilizer bar is no longer able to effectively counteract the lean. This can erode driver confidence and, in an emergency maneuver, could compromise vehicle control.
Another symptom can be a general feeling of looseness or a lack of precision in the steering, particularly on center. As described by automotive experts, steering responsiveness can be dulled, with a noticeable delay between steering input and the vehicle's reaction (gdstauto.com, 2024). This vagueness occurs because the uncontrolled movement of the suspension is no longer being properly managed by the sway bar system.
In more advanced cases of failure, a worn stabilizer link can even contribute to uneven tire wear. The stabilizer system is designed to help distribute weight and forces evenly across the tires during dynamic driving. When a link fails, it can lead to imbalances in how the suspension manages loads, potentially causing one edge of a tire to wear more quickly than the other (gstabilizer.com, 2023). Checking your tires for unusual wear patterns can provide another clue that points toward a suspension issue.
| Symptom | Typical Sound | Feel/Handling Effect | Likely Culprit |
|---|---|---|---|
| Clunking on small bumps | Tajam, bergegas, or "clack" | Minor looseness, most noticeable at low speed. | Pautan Bar Penstabil |
| Groaning over speed bumps | Low-pitched, rubbery creak or groan. | A feeling of stiffness or binding. | Control Arm Bushings |
| Heavy "thud" in turns | Deep, metallic clunk, possibly with a creak. | Vague steering, wandering, a "loose" feeling. | Lower Ball Joints |
| Rattling in steering wheel | Light clunk or rattle felt in the wheel. | Excessive play in the steering wheel. | Batang Pengikat Hujung |
| Bouncy, uncontrolled ride | Hollow knocking or whooshing sounds. | Car floats or bounces excessively after bumps. | Struts/Shock Absorbers |
A Systematic Diagnostic Approach: How to Properly Inspect Your Links
Once you have gathered auditory and sensory evidence, a physical inspection is required to confirm the diagnosis. This is where you move from speculation to certainty. For safety, always perform this inspection on a level surface with the vehicle in park and the parking brake engaged.
-
Visual Inspection: Start with a simple visual check. Use a flashlight to get a clear view of the stabilizer links on both sides of the vehicle. Look for obvious signs of failure as noted by maintenance guides (greatap.com.tw, 2025). Are the rubber boots on the ball joints torn, cracked, or missing entirely? If the boot is compromised, it is only a matter of time before dirt and water contaminate the joint, causing wear and failure. Look for signs of rust or corrosion on the link itself or its fasteners. Is the link bent or broken? While a complete break is obvious, even a slight bend can indicate it has been subjected to extreme force and should be replaced.
-
Physical Manipulation: The definitive test for a worn stabilizer link is to check for play. The best way to do this is with the vehicle's suspension "loaded," meaning its weight is on the tires. Have a helper rock the vehicle from side to side by pushing on the roof or fender. While they are doing this, reach in (being extremely careful to keep your hands away from any moving parts or the tire itself) and firmly grasp the stabilizer link. You should feel for any "clunking" or movement in the ball joints at either end. A good link will feel solid and have no perceptible play. If you can feel or hear a clicking or knocking coming from the link as you hold it, you have found your culprit.
If you cannot safely access the link with the car on the ground, you can raise the front or rear of the vehicle and support it securely on jack stands. Walau bagaimanapun, be aware that this unloads the suspension and may reduce the tension on the stabilizer bar, potentially hiding the play. Dalam kes ini, you may need to use a pry bar to gently apply pressure between the link and the sway bar or control arm to reveal any looseness in the joints. A systematic approach that combines listening, feeling, and seeing is the only reliable way to avoid the costly mistake of misdiagnosis.
Mistake #2: Choosing the Wrong Replacement Part
Once you have confidently diagnosed a faulty stabilizer bar link, the next critical phase is selecting a replacement. It might seem like a simple task—find a part that looks like the old one and install it. Walau bagaimanapun, this assumption is a gateway to the second costly mistake: choosing the wrong part. The market is flooded with options ranging from budget-friendly generics to premium, engineered solutions. The choice you make here has a profound impact not only on the ease of installation but also on the future performance, keselamatan, and longevity of your vehicle's suspension. Selecting an inferior or incorrect part can lead to premature failure, pengendalian yang lemah, and the frustrating experience of having to do the job all over again.
The Pitfalls of "One-Size-Fits-All": Why OEM vs. Aftermarket Matters
The first major decision point is whether to choose an Original Equipment Manufacturer (OEM) part or an aftermarket part. An OEM part is identical to the one your vehicle was fitted with at the factory. An aftermarket part is any part made by a company other than the original manufacturer. There is a common misconception that all aftermarket parts are inferior, which is not true. The landscape is nuanced.
-
OEM Parts: The primary advantage of an OEM part is the guarantee of a perfect fit and original performance. You know it will match the dimensions, bahan, and design intent of the vehicle's engineers. The main disadvantage is typically cost and, sometimes, availability. You usually have to purchase them from a dealership.
-
Aftermarket Parts: This category is vast. It includes everything from low-cost, mass-produced parts that may compromise on materials and quality control, to high-end parts from reputable manufacturers that are designed to meet or even exceed OEM specifications.
The pitfall lies in opting for the cheapest available aftermarket option without considering its quality. A low-cost link might use lower-grade steel, thinner rods, smaller ball studs, or inferior quality rubber for the boots. These compromises can lead to a part that wears out in a fraction of the time of a quality component. It might bend under load, the ball joints may develop play quickly, or the boots may crack and split after a single season of exposure to heat and cold, leading you right back to the clunking noises you just fixed.
Sebaliknya, premium aftermarket manufacturers often identify and correct weaknesses in the original OEM design. Sebagai contoh, a company like Moog is known for engineering problem-solving features into their parts, such as a patented pressed-in cover plate to reduce play or using higher-grade materials for enhanced durability and strength (gdstauto.com, 2023). Choosing a quality aftermarket part can often provide better-than-original performance and longevity, representing excellent value.
Decoding Part Numbers and Specifications: Ensuring a Perfect Fit
Even among quality parts, getting the correct one for your specific vehicle is paramount. Vehicle manufacturers often make subtle changes to suspension components mid-generation. A stabilizer link for a 2025 sedan with the standard suspension might be a different length or have different-sized studs than the same model with a sport suspension package. Using the wrong one can be impossible to install or, worse, can alter the suspension geometry, pre-loading the stabilizer bar and negatively affecting handling.
To avoid this, never purchase a part based on a visual comparison alone. The most reliable method is to use your vehicle's Vehicle Identification Number (VIN). Reputable online suppliers and local parts stores can use the VIN to pinpoint the exact part number required for your car's specific build configuration. If the VIN is not available, you will need the precise year, make, model, and often the sub-model or engine size.
Pay close attention to details in the part description. Does it specify "for models with sport suspension" or "for AWD models only"? Are there different parts for the left and right sides? (While many links are interchangeable, some are side-specific). Taking a few extra minutes to verify these details can save you hours of frustration and a return trip to the parts store.
| Ciri | OEM Stabilizer Link | Low-Quality Aftermarket Link | Premium Aftermarket Link |
|---|---|---|---|
| Reka bentuk | Matches factory specifications exactly. | Often a simplified or reverse-engineered copy. | Meets or exceeds OEM specs; may include design improvements. |
| Materials | Meets manufacturer's standard for durability. | May use lower-grade steel, weaker plastics. | High-quality forged steel or aircraft-grade aluminum. |
| Sendi Bola | Standard design, adequate for normal use. | Smaller ball studs, less durable internal bearings. | Larger ball studs, advanced bearing design for longer life. |
| Boots | Standard rubber, can degrade over time. | Thin, poor-quality rubber that cracks easily. | High-quality polyurethane or chloroprene for durability. |
| Serviceability | Usually sealed and non-serviceable. | Always sealed and non-serviceable. | Often includes a grease fitting (zerk) for re-lubrication. |
| Kos | Highest | Lowest | Sederhana hingga Tinggi |
| Longevity | Baik; matches original part life. | Poor to Fair; may fail prematurely. | Cemerlang; often outlasts the original part. |
Material Matters: Understanding Steel, Aluminium, and Composite Links
The material of the stabilizer link itself also plays a role in its performance and durability.
- Keluli: This is the most common material. It is strong, tahan lama, and cost-effective. High-quality steel links are often forged rather than stamped for maximum strength. The main drawback is weight and susceptibility to rust if the protective coating is compromised.
- Aluminium: Often found on performance vehicles or luxury cars where weight reduction is a priority. Aluminum is lighter than steel while still offering excellent strength. It is also naturally corrosion-resistant. The cost is generally higher.
- Composite/Plastic: Increasingly, modern vehicles are using links with bodies made of high-strength composite plastics. These are extremely lightweight and completely immune to corrosion. While they may seem less robust, they are engineered to be incredibly strong and durable for their intended application.
When choosing a replacement, it is generally best to stick with the material type the vehicle was originally equipped with, unless you are specifically upgrading for a performance application.
Upgrading for Performance: When to Choose Heavy-Duty or Adjustable Links
For the average daily driver, a quality OEM-equivalent replacement is the perfect choice. Walau bagaimanapun, for enthusiasts or those with special use cases, an upgrade might be warranted.
-
Heavy-Duty Links: These are built for vehicles that are frequently used for towing, hauling heavy loads, or aggressive off-roading. They typically feature thicker rods, larger and more robust ball joints, and polyurethane bushings instead of rubber for less deflection under load. They provide a more connected feel but can sometimes transmit more noise and vibration into the cabin.
-
Adjustable Links: If you have modified your vehicle's suspension by lowering or lifting it, the original fixed-length stabilizer links may no longer be the correct length. This can put the stabilizer bar in a constant state of pre-load, negatively impacting handling and ride quality. Adjustable links allow you to change their length to match the new ride height, ensuring the stabilizer bar is in a neutral position when the car is at rest. This is a crucial step for dialing in the handling of a modified suspension.
Making an informed choice about your replacement part is an investment in your vehicle. It is about understanding that not all parts are created equal and that selecting a high-quality, correct-fitting lengan kawalan penggantungan or link is fundamental to a successful and lasting repair.
Mistake #3: Improper Installation Technique
You have successfully diagnosed the problem and have a high-quality, correct-fitting stabilizer bar link in hand. The path to a quiet, stable ride seems clear. Namun, this is where the third, and perhaps most common, costly mistake occurs: improper installation. The mechanical process of swapping the part appears deceptively simple—unbolt the old one, bolt in the new one. This simplicity masks a few critical principles of suspension physics. Ignoring these principles can lead to a host of problems, including immediate damage to the new part, persistent noises, compromised handling, and the sheer frustration of a failed repair. Proper technique is not just about getting the part on the car; it is about doing so in a way that respects the forces at play within the suspension system.
The Critical First Step: Vehicle Preparation and Safety Protocols
Before a single bolt is turned, the foundation for a successful repair is laid with proper safety procedures. Rushing this step is not just bad practice; it is dangerous.
- Secure the Vehicle: Park the vehicle on a solid, level surface—never on grass, kotoran, or an incline. Engage the parking brake firmly and place chocks behind the wheels that will remain on the ground.
- Mengangkat: Use a hydraulic jack rated for the weight of your vehicle. Consult your owner's manual for the correct, reinforced jacking points on the vehicle's frame or subframe. Never lift the vehicle by placing the jack on a suspension component, the engine oil pan, or the transmission.
- Support with Jack Stands: Ini tidak boleh dirunding. Once the vehicle is lifted to the desired height, place appropriately rated jack stands under the designated support points on the frame. Slowly lower the vehicle until its weight is resting entirely on the jack stands. Never, under any circumstances, work under a vehicle supported only by a hydraulic jack. Jacks can and do fail.
Disregarding these safety protocols is the ultimate mistake, one that can have life-altering consequences. Your personal safety is more valuable than any auto part.
The "Loaded" vs. "Unloaded" Suspension Debate: Kenapa pentingnya
This is the single most critical technical concept in replacing a stabilizer bar link. As we discussed, the stabilizer bar is a torsion spring that connects both sides of the suspension. Think about what happens if you only jack up one side of the car. The wheel on the lifted side droops down (unloaded), while the wheel on the ground stays put. This difference in height puts an enormous twisting force—or pre-load—on the stabilizer bar.
If you try to remove or install a stabilizer link in this state, you will be fighting against that stored energy. The bolts will be incredibly difficult to remove, and you might have to use a pry bar to force the new link into place. Forcing a link into position under this tension can damage the delicate new ball joints or tear the bushings before the car has even moved an inch.
The correct procedure is to neutralize this tension. There are two primary ways to achieve this:
-
Method 1 (Preferred): Lift the entire front or rear of the vehicle, placing both the left and right sides on jack stands at an equal height. By allowing both wheels to droop down together, you ensure there is no significant twist in the stabilizer bar. It will be in a relaxed, neutral state, allowing you to remove the old links and install the new ones with minimal effort. The bolts should slide in and out by hand.
-
Method 2 (Alternative): If you can only lift one side at a time, or if you are using drive-on ramps, you must "load" the suspension to get the stabilizer bar into a neutral position. After lifting and securing one corner, place your hydraulic jack under the lower control arm of that same corner and gently raise it until the suspension is compressed to resemble its normal ride height. This action raises the drooping wheel, leveling it out relative to the other side and relieving the tension on the stabilizer bar.
Understanding this principle is the difference between a frustrating fight with the parts and a smooth, professional installation. If you find yourself needing a hammer or a large pry bar to align the bolt holes for a stabilizer link, Berhenti. It is a clear sign that the bar is under tension, and you need to adjust your lifting method.
Torquing to Spec: The Most Overlooked Step
The job is not done when the bolts are tight. It is done when the bolts are tightened to the manufacturer's specified torque. Every fastener on a vehicle has a torque specification for a reason. It represents the precise clamping force needed for that bolt to do its job effectively without failing or causing damage.
- Under-tightening: A loose nut on a stabilizer link will allow for movement, creating the very clunking noise you were trying to eliminate. It can also work itself completely off over time, leading to a sudden failure of the link.
- Over-tightening: This is just as damaging, if not more so. Over-tightening can crush the bushings, stretch and weaken the bolt or stud, or damage the threads in the mounting hole. On a ball joint style link, excessive torque on the stud's nut can damage the internal components of the joint itself. It can also make future removal incredibly difficult.
A calibrated torque wrench is not an optional tool for this job; it is a required one. Torque specifications can be found in a vehicle-specific factory service manual or through online repair databases. They are typically expressed in Newton-meters (Nm) or foot-pounds (ft-lbs). Tighten the nuts until they are snug, then use the torque wrench for the final, precise tightening. It is a step that takes only a moment but ensures the security and longevity of the entire repair.
Correct Orientation and Seating of the Link
Akhirnya, pay attention to the details of the part's orientation. Some links are asymmetrical. Ensure it is installed in the same orientation as the one you removed. When tightening the nuts on a ball joint style link, you will often need to use a second wrench (or a hex key inserted into the end of the stud) to keep the ball stud from spinning. Make sure the stud is fully seated in its mounting hole before you begin tightening. Check that the rubber boots are not twisted or pinched during installation, as this can lead to premature tearing. A properly installed link should look straight and unstressed, with its joints sitting in the middle of their range of motion.
Mistake #4: Ignoring Surrounding Components
Completing a stabilizer bar link replacement with perfect technique can bring a great sense of accomplishment. The clunk is gone, the handling feels tighter, and the car is back on the road. Walau bagaimanapun, if the repair was performed with tunnel vision—focusing only on the link itself—you may have committed the fourth costly mistake: ignoring the health of the surrounding components. The suspension system is a deeply interconnected ecosystem. The failure of one part is often a symptom of, or a contributor to, wear in another. A truly professional repair involves a holistic assessment, viewing the stabilizer link replacement as an opportunity to inspect the neighborhood of parts it lives in. Neglecting to do so can mean overlooking a developing problem that will soon demand your attention and your money.
A Holistic View: Inspecting the Stabilizer Bar Bushings
The stabilizer links connect the ends of the sway bar to the suspension, but the sway bar itself must be mounted to the vehicle's frame or subframe. This is accomplished with two "frame" or "D" bushings, typically made of rubber or polyurethane, that hold the bar in place while still allowing it to rotate. These bushings are wear items, just like the links.
When these bushings wear out, they can produce symptoms that are remarkably similar to those of a bad link. A worn frame bushing allows the stabilizer bar to move and knock against its mounting bracket, creating a clunking or rattling sound, especially over bumps. If you replace the links but the noise persists, there is a strong possibility that the frame bushings were the real culprit, or at least a co-conspirator.
Oleh itu, while you are under the car replacing the links, it is the perfect time to inspect these bushings. Look for visible signs of deterioration: cracks, splitting, or a misshapen, oblong hole where the bar passes through. Try to move the bar up and down or side to side within the bushing bracket. There should be no significant play. If you can move the bar easily, the bushings are worn and should be replaced. They are typically inexpensive and replacing them at the same time as the links is efficient and ensures the entire stabilizer system is restored to optimal condition.
The Domino Effect: Checking Control Arms and Tie Rod Ends
A failed stabilizer bar link does not always die of natural causes. Kadang-kadang, it is a victim of circumstance, pushed to premature failure by excessive movement from other worn suspension or steering components. When one part of the suspension has excessive play, it transfers abnormal stresses and shocks to its neighbors, accelerating their wear. This is the domino effect of suspension decay.
-
Control Arms: The control arms are the primary levers that locate the wheel and allow it to move up and down. They pivot on large rubber bushings and connect to the steering knuckle via a ball joint. If a lengan kawalan penggantungan bushing is severely worn, it allows the entire arm to shift and wobble, sending shock loads through the stabilizer link with every bump and turn. Begitu juga, a worn control arm ball joint creates looseness that the link has to contend with. While you are working in the area, visually inspect the control arm bushings for cracks and use a pry bar to gently check for excessive movement in the bushings and play in the ball joints.
-
Batang Pengikat Hujung: These components connect the steering rack to the steering knuckles, allowing you to turn the wheels. A worn inner or outer tie rod end creates play in the steering system. This "slop" can translate into small, sharp movements at the wheel, which are then transmitted directly to the stabilizer link. To check them, grasp the tire at the 3 dan 9 o'clock positions and try to wiggle it back and forth. Any clunking or play you feel likely indicates a worn tie rod end.
Think of it as a team. If one player is not performing their job correctly, it puts extra strain on the others. Replacing only the stabilizer link without addressing a badly worn control arm bushing is like putting a new shoelace on a boot with a hole in the sole. The new part may fail prematurely because it is being forced to cope with forces it was never designed to handle.
Penjajaran roda: The Necessary Final Step?
A common question after any suspension work is whether a wheel alignment is necessary. For a simple stabilizer bar link replacement, the answer is generally no. The links themselves are not a primary alignment angle determinant. They simply connect two existing points.
Walau bagaimanapun, the answer changes if you have addressed other components during your holistic inspection. If you have replaced a control arm, a tie rod end, or a lower ball joint, then a professional wheel alignment is absolutely required. These components directly affect the critical alignment angles of camber, caster, dan kaki. Failing to get an alignment after replacing them will result in poor handling, crooked steering, and rapid, uneven tire wear that can ruin a new set of tires in just a few thousand miles.
Even if you only replaced the links, it is wise to consider the vehicle's history. If an alignment has not been performed in a long time, or if you were experiencing uneven tire wear (a symptom that led you to the repair), then getting an alignment is a prudent investment. It ensures that the entire suspension and steering system is working in harmony, maximizing tire life, fuel economy, dan, most importantly, vehicle safety.
Mistake #5: Neglecting Post-Installation Checks and Long-Term Maintenance
The final bolts are torqued, the tools are put away, and the vehicle is back on the ground. The temptation is to call the job complete and simply drive away, enjoying the absence of noise. To do so, Walau bagaimanapun, is to commit the fifth subtle but significant mistake: neglecting the crucial phases of verification and long-term care. A professional repair does not end with the installation; it ends with confirmation that the repair was successful and with a plan to maintain the integrity of the system going forward. This final stage is what separates a mere parts-swapper from a true, conscientious mechanic. It is the final seal on a job well done, ensuring the repair is not just a temporary fix but a lasting solution.
The Test Drive: What to Listen and Feel For
The immediate post-repair test drive is a critical diagnostic tool. It is your opportunity to confirm that the problem has been solved and that no new issues have been introduced. The key is to conduct this test drive with purpose and heightened senses.
- Choose a Familiar Route: Drive on a route you know well, one that includes a variety of road surfaces—smooth pavement, some bumps, and a few turns. Your familiarity with how the car should feel on this route will make any abnormalities stand out.
- Turn Off the Radio: Just as in the initial diagnosis, silence is your best friend. Listen intently as you drive. Can you hear the original clunk or rattle? Recreate the conditions that used to produce the noise, such as going over a speed bump at an angle or making a low-speed turn into a driveway. The goal is to hear nothing but the normal sounds of the tires on the road.
- Feel the Steering and Handling: Pay close attention to how the car feels. Does the steering feel more direct and responsive? Is the excessive body roll you previously felt in turns now gone? The car should feel more "put together," more stable and confident. If the steering wheel is off-center or the car pulls to one side, it's a sign that something is amiss—perhaps another worn component was overlooked, or an alignment is needed.
- Listen for New Noises: Be alert for any new sounds. A scraping or rubbing sound could indicate a brake dust shield was bent during installation. A new creak could mean a bolt was not fully tightened.
If the original noise is gone and the car handles correctly, you can be confident in your repair. If the noise persists, it is a humbling but important moment to revisit your diagnosis. Perhaps the noise was coming from the sway bar frame bushings, or another component entirely.
The 100-Mile Re-Torque: A Professional Precaution
This is a step that many DIY mechanics and even some professional shops overlook, but it is a hallmark of a truly thorough job. After you have driven the vehicle for a period—say, 50 ke 100 batu (atau 80 ke 160 kilometer)—it is wise to safely re-lift the vehicle and re-check the torque on the fasteners you replaced.
Why is this necessary? Semasa anda memandu, the new components settle into place. The minute vibrations and forces of driving can cause a tiny amount of compression or seating in the new bushings and mounting points. This can, dalam beberapa kes, slightly reduce the clamping force of the nuts and bolts. Re-torquing the fasteners to their specified value after this initial settling period ensures they are at their optimal tightness for the long term. It is a simple, quick check that provides an extra layer of security and peace of mind, guaranteeing that a properly tightened fastener does not become a loose one over time.
Creating a Maintenance Schedule: Extending the Life of Your Suspension System
The replacement of a failed part should serve as a reminder that all vehicle components have a finite lifespan. You can extend the life of your new stabilizer links and the entire suspension system by shifting from a reactive repair mindset to a proactive maintenance mindset.
-
Regular Inspections: Make suspension inspection a part of your routine maintenance, just like an oil change. Every six months or so, take a few minutes with a flashlight to perform a visual check of the suspension components. Look at the rubber boots on your new links, the tie rod ends, and the ball joints. Check for tears, leaks, or signs of degradation. Look at the control arm bushings and sway bar frame bushings for cracks. Early detection is key (greatap.com.tw, 2025).
-
Serviceable Joints: If you chose to install premium aftermarket links that include grease fittings (zerks), make use of them. Giving them a pump of fresh, compatible chassis grease with every oil change flushes out old grease and contaminants, dramatically extending the life of the ball joint.
-
Driving Habits: Be mindful of how you drive. Avoiding potholes when possible, slowing down for speed bumps, and taking a smooth approach to curbs and driveways reduces the shock loads transmitted through the entire suspension system, lessening the wear and tear on every component, including your stabilizer links.
By embracing this final phase of verification and long-term care, you elevate your work from a simple repair to a comprehensive act of vehicle stewardship. You ensure your safety, maximize the value of your investment in quality parts, and foster a deeper connection with and understanding of the machine you rely on every day.
Soalan yang sering ditanya (Soalan Lazim)
How much does it cost to replace a stabilizer bar link? The cost can vary significantly based on the vehicle and whether you do the work yourself. The part itself is generally inexpensive, often ranging from $20 ke $70 per link. If you take it to a mechanic, the total cost for replacing a single link is typically between $104 dan $146, with labor accounting for 1-2 hours of work (gsplatinamerica.com, 2022; uchanics.ca, 2023). Replacing them in pairs is common, which would adjust the total cost accordingly.
Can I drive with a broken stabilizer bar link? While it is technically possible to drive with a broken link, it is not recommended for anything other than a short, slow-speed trip to a repair shop. A broken link will not cause you to lose a wheel, but it will result in significant body roll, pengendalian yang lemah, and unpredictability during turns or emergency maneuvers. The broken part can also bang against other suspension components, potentially causing further damage.
Do I need to replace both links at the same time? Ia sangat disyorkan. Stabilizer links on both sides of the vehicle experience the same conditions and mileage. If one has failed due to wear, yang lain mungkin tidak jauh di belakang. Replacing them in pairs ensures balanced handling and prevents you from having to do the same job on the other side in the near future.
What tools do I need to replace a stabilizer bar link? The basic tools required include a hydraulic jack, Jack berdiri, chocks roda, a socket set and ratchet, a set of wrenches (including an open-end wrench to hold the stud while tightening), and a calibrated torque wrench. Depending on the condition of the old part, you may also need penetrating oil for rusted bolts, a wire brush for cleaning, and potentially a pry bar.
How long does a stabilizer bar link last? The lifespan of a stabilizer bar link depends heavily on driving conditions, iklim, and the quality of the part. Original equipment links on a car driven on smooth highways might last 80,000 batu atau lebih. On a vehicle in a region with harsh winters and salted roads, or one that is frequently driven on rough terrain, they might fail in as little as 30,000 batu. High-quality aftermarket parts can often outlast their OEM counterparts (gdstauto.com, 2023).
What is the difference between a stabilizer link and a sway bar link? There is no difference. "Stabilizer link," "sway bar link," and "anti-roll bar link" are all interchangeable terms for the exact same part (gstabilizer.com, 2023). The terminology used often varies by region or manufacturer, but they all refer to the component that connects the stabilizer (sway/anti-roll) bar to the rest of the suspension.
Kesimpulan
Navigating the intricacies of a stabilizer bar link replacement reveals a truth applicable to all aspects of vehicle maintenance: the difference between a successful, lasting repair and a frustrating, temporary fix lies in the details. Avoiding the five common mistakes—misdiagnosis, poor part selection, improper technique, neglect of surrounding components, and lack of post-installation diligence—is not merely about following a set of rules. It is about adopting a more thoughtful and holistic philosophy of repair. It requires you to become a detective, listening to the subtle language of your vehicle; a discerning consumer, choosing quality over convenience; a disciplined technician, respecting the physics of the system; and a responsible steward, seeing beyond the immediate problem to the health of the whole.
By doing so, you transform a simple task into an act of empowerment. You save money not just on the parts themselves but by preventing the collateral damage and repeat failures that stem from hurried work. You restore the safety and dynamic performance that the vehicle's engineers intended. And perhaps most rewarding of all, you deepen your understanding of and connection to the complex machine you command, ensuring that every turn you take is as stable, secure, and quiet as it was designed to be, with the confidence that comes from a job done right with high-quality stabilizer links.
Rujukan
gdstauto.com. (2023, November 14). Top 10 stabilizer link manufacturers you need to know. GDST. https://gdstauto.com/top-10-stabilizer-link-manufacturers-you-need-to-know/
gdstauto.com. (2024, Januari 23). Stabilizer links 101: What you need to know. GDST. https://gdstauto.com/stabilizers-link-101-what-you-need-to-know/
greatap.com.tw. (2025). Common causes of wear and tear: Why KIA stabilizer bar links fail. Great Auto Parts. https://www.greatap.com.tw/en/category/F010110.html
gsplatinamerica.com. (2022, Jun 21). What is a stabilizer link? GSP. https://www.gsplatinamerica.com/post/what-is-a-stabilizer-link
gstabilizer.com. (2023, Julai 14). 7 signs your stabilizer link needs replacement. GSP Stabilizer. https://gstabilizer.com/7-signs-stabilizer-link-needs-replacement/
gstabilizer.com. (2023, Julai 14). The ultimate guide to anti-roll bar link maintenance. GSP Stabilizer. https://gstabilizer.com/the-guide-to-anti-roll-bar-link-maintenance/
uchanics.ca. (2023, Mac 30). Stabilizer bar links replacement cost and guide. Uchanics. https://uchanics.ca/stabilizer-bar-links-replacement-cost-and-guide/