


Abstract
The lower control arm serves as a foundational linkage within a vehicle's suspension system, physically connecting the chassis to the steering knuckle or wheel hub assembly. Its primary function is to manage the vertical articulation of the wheel, allowing it to move up and down in response to road surface irregularities while constraining its movement in other planes. By acting as a critical pivot point, it plays an indispensable role in defining the vehicle's suspension geometry, directly influencing steering response, handling stability, and ride comfort. The arm, through its bushings and ball joint, absorbs significant longitudinal and lateral forces generated during acceleration, braking, and cornering. Understanding its function is paramount, as failure of this component can lead to a sudden loss of vehicle control, abnormal tire wear, and compromised safety. This exploration examines the precise mechanics of the lower control arm, its structural components, common failure modes, and the diagnostic indicators that signal a need for inspection or replacement.
Key Takeaways
- Connects the vehicle's frame to the wheel assembly, allowing vertical wheel movement.
- Manages steering geometry and absorbs road shocks for a stable, comfortable ride.
- Knowing what a lower control arm does helps you diagnose issues like clunking sounds.
- Failure symptoms include steering wander, uneven tire wear, and vibrations.
- Worn bushings and ball joints are the most common points of failure on the arm.
- Timely replacement prevents further damage to tires and other suspension parts.
Table of Contents
- Deconstructing the Suspension System: A Foundational Overview
- The Core Function: What Does a Lower Control Arm Do?
- Anatomy of a Lower Control Arm: Materials and Components
- The 5 Telltale Signs of a Failing Lower Control Arm
- The Causal Chain: Why Do Lower Control Arms Fail?
- The Diagnostic Process: From Symptom to Solution
- The Replacement Imperative: Safety, Performance, and Cost
- Frequently Asked Questions (FAQ)
- Conclusion
- References
Deconstructing the Suspension System: A Foundational Overview
To truly grasp the significance of a single component, one must first appreciate the ecosystem in which it operates. Imagine a symphony orchestra; the violin section is vital, but its music only makes sense in the context of the strings, woodwinds, brass, and percussion all playing in concert. Similarly, the lower control arm is a star player in the complex orchestra that is your vehicle's suspension system. The purpose of this system extends far beyond simply providing a comfortable ride; it is a masterclass in dynamic physics, engineered to keep your tires firmly planted on the road, ensuring both safety and control (J.D. Power, 2021).
At its heart, a suspension system negotiates a fundamental conflict: the vehicle's body (and its occupants) desires a smooth, undisturbed path, while the wheels must follow the chaotic, uneven contours of the road. The collection of springs, shock absorbers (dampers), and linkages that form the suspension manages this conflict. The control arms are the primary linkages in this arrangement, serving as the direct, hinged connection between the vehicle's frame (the sprung mass) and the wheel assemblies (the unsprung mass). Their role is to guide the wheels' movement precisely. Think of them as the puppeteer's strings, dictating the dance of the wheels over every bump and dip. Without them, the wheels would be untethered, and the vehicle would be uncontrollable.
The Two Worlds: Sprung vs. Unsprung Mass
To deepen our understanding, let's consider the concepts of sprung and unsprung mass. Sprung mass includes all the parts of the vehicle supported by the springs, such as the chassis, engine, body, and you, the passenger. The goal is to isolate this mass from road disturbances. Unsprung mass, conversely, comprises everything not supported by the springs, which moves directly with the road's surface. This includes the wheels, tires, brake assemblies, and a significant portion of the suspension itself, including the lower control arm.
The engineering ideal is to minimize unsprung mass. Why? Because a lighter wheel and suspension assembly can react more quickly to changes in the road surface. It has less inertia, so it can be pushed up by a bump and then pushed back down by the spring onto the road surface more rapidly. A quicker reaction means the tire spends more time in contact with the pavement, which is the ultimate goal for grip, handling, and braking. A heavy, clumsy unsprung mass will tend to bounce and skip after hitting a bump, compromising traction. The lower control arm, while part of the unsprung mass, is designed to be as light as possible without sacrificing the immense strength required for its job.
A Tale of Two Suspension Designs
The specific configuration of control arms varies significantly between different suspension designs. The two most prevalent types in modern passenger cars are the MacPherson strut and the double wishbone setup. Understanding their differences illuminates the specific responsibilities placed upon the lower control arm in each context.
A MacPherson strut system, prized for its simplicity, packaging efficiency, and low cost, uses only a single lower control arm. In this design, the telescopic strut—which combines the spring and shock absorber into one unit—acts as the upper locating link for the wheel. The lower control arm forms the bottom side of a triangle, with the strut forming the upper side and the vehicle's chassis forming the third point. This design places a heavy burden on the lower control arm and its associated ball joint and bushings, as it is the sole component locating the bottom of the wheel.
The double wishbone suspension, often found on performance, luxury, or heavy-duty vehicles, uses two control arms: an upper and a lower arm. These arms are typically A-shaped (hence the name "wishbone") and provide a more precise definition of the wheel's motion. By having two arms, engineers can finely tune the wheel's camber angle (the tilt of the wheel relative to vertical) as it moves up and down. This allows for a better contact patch between the tire and the road during hard cornering and over bumps, enhancing grip and stability. In this setup, the lower control arm shares the load with the upper arm, but it remains the primary load-bearing member, especially concerning forces from braking and acceleration.
| Feature | MacPherson Strut Suspension | Double Wishbone Suspension |
|---|---|---|
| Control Arms | One lower control arm per wheel | One upper and one lower control arm per wheel |
| Primary Function | The lower arm locates the bottom of the wheel; the strut acts as the upper link. | Both arms work together to precisely control wheel motion and geometry. |
| Complexity & Cost | Lower complexity, fewer parts, generally less expensive to manufacture. | Higher complexity, more parts, generally more expensive. |
| Performance | Good, but camber control is less precise during suspension travel. | Excellent; allows for optimized camber control for superior handling and grip. |
| Common Use | Most front-wheel-drive and economy cars. | Performance cars, luxury sedans, SUVs, and trucks. |
| Role of Lower Arm | Solely responsible for locating the bottom of the wheel; bears significant load. | The primary load-bearing arm, but works in concert with the upper arm. |
The Core Function: What Does a Lower Control Arm Do?
Having set the stage within the broader suspension system, we can now zoom in and focus our lens on the protagonist of our story. So, what does a lower control arm do in a more granular, mechanical sense? Its job is multifaceted, involving the management of movement, the facilitation of steering, and the absorption of immense forces. It is not merely a passive bracket; it is an active participant in the dynamic conversation between your car and the road.
The Pivotal Connection: Linking the Chassis and the Wheel Hub
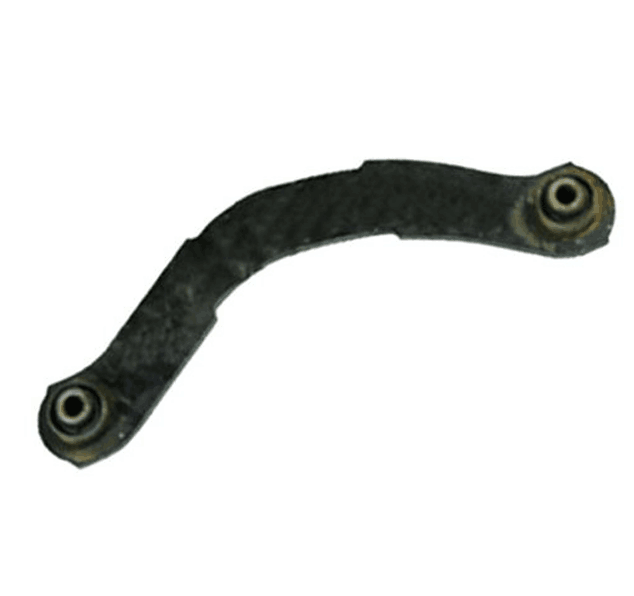
At its most basic level, the lower control arm is a rigid link with two key connection points. One end connects to the vehicle's chassis or subframe via flexible rubber or polyurethane bushings. The other end connects to the steering knuckle (the component that holds the wheel hub and bearings) via a ball joint . This arrangement creates a hinge. The bushings allow the entire arm to pivot up and down relative to the car's body, while the ball joint allows the steering knuckle to pivot for steering and articulate as the suspension moves.
Think of your own arm. Your shoulder joint allows your arm to move up and down, much like the bushings allow the control arm to pivot. Your wrist allows your hand to angle and turn in multiple directions, much like the ball joint allows the wheel to steer and tilt. The lower control arm, therefore, acts as the vehicle's "humerus," the strong bone connecting the flexible shoulder (chassis bushings) to the versatile wrist (ball joint). This fundamental connection is what allows an independently suspended wheel to move without affecting the wheel on the opposite side.
Managing Vertical Movement: The Dance with Road Imperfections
The most obvious job of the suspension is to absorb bumps. When a wheel encounters a pothole or a speed bump, it needs to be able to move vertically, independent of the vehicle's body. The lower control arm is the primary guide for this vertical motion. As the wheel is forced upward by a bump, the control arm pivots on its chassis-side bushings, guiding the wheel hub in a carefully prescribed arc.
The length and mounting angle of the lower control arm are meticulously engineered. They determine the geometry of this arc, which in turn affects characteristics like camber change and track width change during suspension travel. The goal is to keep the tire as flat and true to the road surface as possible throughout its range of motion. A well-designed system, guided by the lower control arm, ensures that hitting a bump doesn't just result in a jolt but is translated into a controlled, predictable movement that maintains tire contact and vehicle stability. The full understanding of what does a lower control arm do involves appreciating this geometric guidance.
Facilitating Steering: The Geometry of Motion
The lower control arm's role is not limited to up-and-down movement. It is a cornerstone of the vehicle's steering geometry. The steering knuckle, to which the control arm attaches, is also connected to the tie rod. The tie rod pushes and pulls on the knuckle to make the wheel turn left or right. However, for this to work, the knuckle needs a stable, defined pivot axis.
The lower ball joint (on the control arm) and the upper pivot point (either an upper ball joint in a double-wishbone setup or the upper strut mount in a MacPherson strut design) create this steering axis. The lower control arm provides the foundational lower pivot point. Its position determines critical alignment angles like caster and camber.
- Camber is the inward or outward tilt of the top of the tire. The control arm's length and pivot points dictate the static camber and how it changes as the suspension compresses and rebounds.
- Caster is the forward or rearward tilt of the steering axis. A properly positioned lower control arm helps establish the correct caster angle, which is vital for steering stability and the steering wheel's tendency to return to center after a turn.
Without the lower control arm holding the bottom of the knuckle securely in place, steering would be impossible. The wheel would flop around uncontrollably. The arm provides the stable-yet-flexible anchor that allows the precise inputs from the steering system to be translated into a change in the vehicle's direction. The query of what does a lower control arm do is fundamentally linked to the vehicle's ability to be steered.
Absorbing Forces: Resisting Acceleration and Braking Loads
Beyond guiding movement, a suspension control arm is a major structural component that must withstand tremendous forces. Think about what happens when you accelerate hard. The engine's torque is trying to twist the wheel, and this force is transferred through the axle to the wheel hub. The lower control arm must resist this twisting force, keeping the wheel assembly properly located.
The forces during braking are even more significant. When you slam on the brakes, the vehicle's entire momentum creates a massive forward weight transfer. The brake calipers clamp down on the rotors, attempting to stop the wheels' rotation. This braking torque tries to wrench the entire wheel assembly backward relative to the car. The lower control arm, and specifically its strong construction and robust bushings, bears the brunt of this longitudinal force. It acts as a brace, preventing the wheel from being pushed backward and ensuring the vehicle tracks straight and true under braking. Similarly, during hard cornering, immense lateral (side-to-side) forces are trying to push the wheel sideways. The lower control arm is the primary component resisting these forces and maintaining the car's cornering posture.
Anatomy of a Lower Control Arm: Materials and Components
To fully appreciate what a lower control arm does, we must dissect it and examine its constituent parts. It is not a single, uniform piece of metal but an assembly of engineered components, each with a specific purpose. The arm itself provides the structure, the bushings provide the flexible pivot, and the ball joint provides the articulating connection. The choice of materials and the design of these components are dictated by a balance of strength, weight, and cost.
The Arm Itself: A Study in Materials
The main body of the lower control arm is typically formed from one of three materials, each with its own set of advantages and disadvantages. The selection depends on the vehicle's intended application, performance targets, and price point. Exploring a catalog of high-quality suspension control arms often reveals a variety of these material choices.
-
Stamped Steel: This is the most common and cost-effective method. It involves stamping and welding together multiple pieces of sheet steel to form a hollow, box-like or U-shaped arm. Stamped steel arms offer a good balance of strength and weight for the majority of passenger cars. They are relatively cheap to produce in high volumes. However, they can be heavier than their aluminum counterparts and may be more susceptible to bending under extreme impact. Their hollow nature can also trap moisture, leading to internal corrosion over time.
-
Cast Iron: For heavy-duty applications like trucks and large SUVs, cast iron is often the material of choice. The arm is created by pouring molten iron into a mold. Cast iron is incredibly strong and durable, capable of withstanding the immense loads associated with heavy vehicles and towing. It is also highly resistant to fatigue failure. The main drawbacks are its significant weight, which increases unsprung mass, and its brittle nature—under a sufficiently severe impact, it is more likely to crack or fracture than to bend.
-
Forged or Cast Aluminum: Found on performance and luxury vehicles where minimizing unsprung weight is a priority, aluminum arms offer an excellent strength-to-weight ratio. Forging involves shaping a solid billet of aluminum under extreme pressure, creating a very strong, dense grain structure. Casting aluminum is similar to casting iron but with a lighter material. Aluminum arms significantly reduce unsprung mass, improving handling response and ride quality. They are also naturally corrosion-resistant. The primary disadvantage is cost; both the raw material and the manufacturing processes are substantially more expensive than for steel or iron.
| Material | Primary Advantage | Primary Disadvantage | Common Application |
|---|---|---|---|
| Stamped Steel | Low cost, good strength | Heavier than aluminum, can corrode | Mainstream passenger cars and crossovers |
| Cast Iron | Extremely high strength and durability | Very heavy, can be brittle | Trucks, heavy-duty SUVs, commercial vehicles |
| Forged/Cast Aluminum | Excellent strength-to-weight ratio, corrosion resistant | High cost | Performance cars, luxury vehicles, high-end SUVs |
The Bushings: The Silent, Flexible Joints
If the arm is the bone, the bushings are the cartilage. These are the flexible connectors that mount the control arm to the vehicle's subframe. Typically, a lower control arm will have two bushings at its inboard pivot points. A bushing consists of a metal inner sleeve, a metal outer sleeve, and a cylinder of flexible material bonded between them. Their job is threefold: to allow the arm to pivot smoothly, to absorb high-frequency vibrations from the road, and to provide a controlled amount of compliance (flex) to fine-tune the suspension's behavior.
The material used for the flexible element is usually either rubber or polyurethane.
- Rubber Bushings: Original equipment manufacturers (OEMs) almost universally use rubber bushings. Natural or synthetic rubber is excellent at isolating noise, vibration, and harshness (NVH). It provides a comfortable, quiet ride. The rubber is often engineered with specific voids or cutouts to allow for different levels of stiffness in different directions. The downside of rubber is that it perishes over time. It is susceptible to dry rot, cracking, and degradation from exposure to oil, road salts, and ozone. As it degrades, it becomes soft and allows for excessive, uncontrolled movement.
- Polyurethane (Poly) Bushings: The aftermarket offers polyurethane bushings as a performance upgrade. Polyurethane is a much stiffer material than rubber and is highly resistant to oil, chemicals, and degradation. This stiffness results in more precise and direct handling, as there is less unwanted flex in the suspension geometry under load. The trade-off is a significant increase in the transmission of NVH. A car with poly bushings will feel more connected to the road, but it will also have a harsher, noisier ride.
The Ball Joint: The Articulating Heart
The ball joint is the critical connection between the outer end of the lower control arm and the steering knuckle. It is a marvel of simple, robust engineering: a ball-and-socket joint, very much like a human hip. It consists of a metal stud with a ball on one end, which sits inside a lubricated metal or polymer-lined socket. The entire assembly is sealed with a rubber boot to keep grease in and contaminants out.
The purpose of the ball joint is to allow for two different types of movement simultaneously. It must pivot to accommodate the up-and-down arc of the suspension control arm, while also allowing the steering knuckle to rotate for steering. It is a load-bearing component, supporting a significant portion of the vehicle's weight in many suspension designs.
The function of this component is very similar to that of a tie rod ball joint, which connects the tie rod to the steering knuckle. Both are ball-and-socket joints designed to translate linear motion into angular motion while allowing for articulation. However, the lower ball joint is typically much larger and more robust than a tie rod ball joint because it often has to bear vertical loads from the vehicle's weight in addition to handling steering and suspension forces. A failure in a tie rod ball joint leads to sloppy steering, but a complete failure of a load-bearing lower ball joint can cause the entire wheel to collapse, resulting in a catastrophic loss of control. This highlights the immense importance of this small but mighty component in the context of what a lower control arm does.
The 5 Telltale Signs of a Failing Lower Control Arm
A lower control arm is a wear-and-tear item. Its bushings and ball joint have a finite lifespan. Recognizing the symptoms of a failing arm is not just a matter of maintenance; it is a matter of safety. The signs can range from subtle auditory cues to dramatic changes in vehicle behavior. Ignoring them can lead to more expensive repairs down the line and, more alarmingly, can compromise your ability to control the vehicle. Let's examine the five most common indicators that your lower control arm may be in distress.
Sign 1: Audible Disturbances – Clunking, Popping, and Creaking
Your ears are often the first diagnostic tool to pick up on suspension problems. A healthy suspension is largely silent, save for the hum of the tires and the soft whoosh of the dampers. When a lower control arm begins to fail, it introduces a new, unwelcome vocabulary of sounds.
-
Clunking or Knocking: This is the most classic symptom. It is often heard when driving over bumps, potholes, or uneven road surfaces. The sound is typically a distinct, heavy "clunk" or "thud" emanating from one corner of the vehicle. What you are hearing is the sound of excessive movement. When a bushing is worn out, it creates empty space or "play" where there should be none. As the suspension compresses and rebounds, the metal components of the control arm assembly slam against each other, creating the clunk. A severely worn ball joint can produce a similar noise as the ball stud knocks around inside its socket. The central aspect of what does a lower control arm do is to control movement, and this sound is the audible evidence of that control being lost.
-
Popping or Snapping: A sharp popping sound, often heard during low-speed turns (like pulling into a parking space), can point directly to a failing ball joint. The ball joint is binding and then suddenly releasing as the steering angle changes, creating a pop. Think of it like cracking your knuckles; pressure builds and is then released with a sound.
-
Creaking or Squeaking: A persistent creaking sound, like an old rusty door hinge, often manifests when the suspension moves up and down, even over small undulations or when getting in and out of the car. This sound is frequently caused by dried-out, worn rubber bushings. The rubber loses its suppleness and starts to rub against the metal sleeves, creating the squeak. It can also be a sign of a ball joint that has lost its lubrication and is now experiencing metal-on-metal friction.
Sign 2: Steering Instability – Wandering and Vagueness
The lower control arm is a cornerstone of your vehicle's steering geometry. When its components wear out, that geometric precision is lost, and the effects are felt directly through the steering wheel.
-
Steering Wander: Does your car seem to have a mind of its own? Do you find yourself constantly making small corrections to the steering wheel just to keep the car tracking straight on a level highway? This is known as steering wander. Worn control arm bushings are a primary culprit. The soft, degraded rubber allows the entire wheel assembly to shift slightly forward, backward, or side-to-side under normal driving forces. This constant, minute shifting of the wheel's alignment means the car drifts and wanders, requiring you to "herd" it back into line. This is a direct consequence of the arm failing its duty to rigidly locate the wheel.
-
Vague or Sloppy Steering: A new car has a crisp, responsive steering feel. When you turn the wheel slightly, the car reacts immediately. A vehicle with worn control arms will develop a "dead spot" or a feeling of vagueness in the center of the steering. You might turn the wheel a few degrees in either direction before the car begins to respond. This slop comes from the accumulated play in worn bushings and the lower ball joint. Your steering input has to first take up all the slack in these worn components before it can actually begin to turn the wheel. A related component that can cause this is a worn tie rod ball joint, but worn control arm components are a very common cause.
Sign 3: Uneven and Premature Tire Wear
Your tires are an excellent, albeit expensive, report card for the health of your suspension. A properly aligned and functioning suspension will result in tires that wear down slowly and evenly across their tread surface. A failing lower control arm will write a story of dysfunction directly onto your tire treads.
When the bushings or ball joint of a suspension control arm wear out, they can no longer hold the wheel at the correct alignment angles (camber and toe).
-
Camber Wear: A worn ball joint or severely degraded bushings can allow the wheel to tilt inwards or outwards. If the top of the tire tilts too far inward (negative camber), the inside edge of the tire will wear out prematurely. If it tilts too far outward (positive camber), the outside edge will wear rapidly. If you see one edge of your tire's tread looking bald while the rest of the tread has plenty of life, a failing control arm is a prime suspect.
-
Toe Wear / Feathering: Worn bushings that allow for longitudinal (fore-aft) movement can cause the "toe" angle of the wheel to change dynamically while driving. This can lead to a "feathered" or "scalloped" wear pattern across the tread blocks. If you run your hand over the tread, it will feel smooth in one direction and sharp in the other. This is because the tire is essentially being dragged sideways slightly as it rolls forward, scrubbing the tread off in a distinctive pattern. A clear understanding of what does a lower control arm do in maintaining alignment makes it easy to see how its failure leads to this type of tire destruction.
Sign 4: Vibrations Through the Steering Wheel
A vibration that you can feel through the steering wheel, particularly at certain speeds, can be a symptom of a variety of issues, including unbalanced tires. However, it can also be a clear indication of a failing lower control arm.
This vibration is different from the shimmy caused by an out-of-balance tire, which is typically a very high-frequency, consistent shake. The vibration from a worn control arm can feel more like a wobble or a shimmy that comes and goes, often getting worse when you hit a small bump. This is sometimes referred to as "shimmy" or even a precursor to "death wobble" in solid-axle vehicles.
The cause is, once again, excessive play. A worn ball joint or bushings allow the wheel to oscillate slightly and uncontrollably at certain rotational speeds. The wheel is essentially wobbling on its axis, and this movement is transmitted up the steering column to your hands. If the vibration gets noticeably worse during braking, it could point to worn control arm bushings that are allowing the wheel to shudder back and forth under the strain of braking forces.
Sign 5: Visible Damage and Bushing Degradation
Sometimes, the most definitive diagnosis comes from a simple visual inspection. If you are experiencing any of the symptoms above, it is wise to take a look at the components themselves, provided you can do so safely.
-
Cracked or Torn Bushings: Get a flashlight and look at the points where the lower control arm connects to the car's frame. You should see the rubber bushings. In a healthy bushing, the rubber will be solid and intact. In a failing one, you will likely see significant cracks, tearing, or even chunks of rubber that are missing entirely. The rubber may look "dry-rotted," similar to an old, weathered tire. You may also see that the center metal sleeve has shifted significantly off-center within the outer sleeve, a clear sign of collapse.
-
Torn Ball Joint Boot: Inspect the ball joint where the arm meets the steering knuckle. It should be covered by a small, concertina-like rubber boot. If this boot is torn, ripped, or missing, the ball joint's failure is imminent, even if it is not making noise yet. A torn boot allows the vital lubricating grease to escape and allows water, dirt, and road salt to enter. This contamination rapidly destroys the smooth surfaces inside the joint, leading to wear, play, and eventual failure.
-
Bent or Rusted Arm: While less common, the arm itself can be damaged. After a significant impact with a pothole, curb, or road debris, the arm can be bent. A bent suspension control arm will throw the wheel alignment out of specification and is an immediate safety concern. In older vehicles or those from regions with heavy road salt use, severe rust and corrosion can compromise the structural integrity of a stamped steel arm, potentially leading to a fracture.
The Causal Chain: Why Do Lower Control Arms Fail?
Lower control arms are built to be robust, but they do not last forever. Their failure is rarely a sudden event but rather a gradual process of degradation driven by a combination of factors. Understanding these causes can help in appreciating the importance of regular inspection and recognizing that replacement is an inevitable part of long-term vehicle ownership. The process is a narrative of physics, chemistry, and the relentless reality of the road.
The Inevitability of Wear and Tear: Mileage and Time
The most common cause of failure is simply the accumulation of miles and time. Every time your car goes over a bump, every time you turn the steering wheel, and every time you step on the brakes, the components of the lower control arm are put to work.
-
Bushings: The rubber in the bushings is in a constant state of flex and compression. Over hundreds of thousands of cycles, the polymer chains in the rubber begin to break down. The material loses its elasticity and strength. This is simple fatigue. Time also plays a role, as ozone in the air and heat from the engine bay contribute to the process of dry rot, making the rubber brittle and prone to cracking, even on a low-mileage older car.
-
Ball Joints: The ball joint is in constant motion. The hardened steel ball pivots within its socket millions of times over the life of a vehicle. Despite being lubricated, this microscopic friction eventually leads to wear. The precisely machined surfaces of the ball and socket slowly wear away, creating looseness or "play" in the joint. The more the joint wears, the more it can move and the faster the wear accelerates, leading to the clunking sounds discussed earlier. It is a feedback loop of degradation.
The lifespan of these components can vary widely, from as little as 60,000 miles (approx. 96,000 km) in harsh conditions to well over 150,000 miles (approx. 240,000 km) under ideal circumstances. But eventually, fatigue will win.
The Impact of Environment: Corrosion and Contamination
The undercarriage of a car is a hostile environment. It is exposed to water, dirt, road salt, and other corrosive chemicals. This environment actively attacks the components of the lower control arm.
-
Corrosion of the Arm: Stamped steel and cast iron control arms are susceptible to rust. While they are coated from the factory, this coating can be chipped away by road debris. Once the bare metal is exposed, especially in the presence of road salt used in snowy climates, rust can take hold. Surface rust is often just a cosmetic issue, but if left unchecked, it can penetrate the metal, weakening the structural integrity of the arm itself. This is particularly dangerous on hollow stamped-steel arms, where rust can eat through from the inside out.
-
Contamination of Joints: The rubber boots on the ball joints and the seals on some bushings are the first line of defense. A small tear in a ball joint boot, caused by road debris or age, is a death sentence for the joint. Water and grit get inside and mix with the grease, creating an abrasive paste that grinds away at the internal components. The smooth, low-friction environment is replaced by a gritty, high-friction one, and the joint wears out in a fraction of its normal lifespan. This is why a visual inspection of these boots is so important.
The Trauma of the Road: Potholes and Sudden Impacts
While normal wear and tear is a gradual process, a single, violent event can cause immediate failure or severely shorten the life of a lower control arm. Hitting a deep pothole at speed, striking a curb, or being involved in a minor collision can subject the suspension to forces far beyond what it is designed to handle in normal operation.
Imagine the force involved: the entire weight of one corner of the car, moving at speed, is suddenly stopped or redirected by an impact. This shockwave travels directly into the tire, through the wheel, and is absorbed by the suspension. The lower control arm is on the front line of this impact.
- Bent Arm: A sufficiently strong impact can physically bend a steel or aluminum control arm. A bent arm is structurally compromised and will make it impossible to correctly align the vehicle.
- Blown-out Bushings: The sudden, violent force can tear the rubber of a bushing or even force the inner sleeve to break its bond with the rubber, creating massive play instantly.
- Damaged Ball Joint: The shock can cause the ball stud to impact the inside of its socket with such force that it deforms the socket or damages the stud, leading to immediate looseness.
After any significant impact to a wheel, even if the tire is not flat and the car seems to drive straight, it is a wise precaution to have the suspension, including the lower control arm, inspected for damage.
The Ripple Effect: Failure of Associated Components
The suspension is an interconnected system. The failure of one part can accelerate the wear on others. For instance, a completely failed shock absorber that no longer dampens suspension movement will allow the wheel to bounce excessively after hitting a bump. This constant, uncontrolled oscillation puts immense stress on the control arm bushings and ball joint, causing them to wear out much faster than they normally would.
Similarly, other worn suspension links, like a bad stabilizer link, can alter the forces being transmitted through the system. A stabilizer link (or sway bar link) connects the end of the stabilizer bar to the suspension, often to the control arm itself. If the stabilizer link bushings are worn, it can cause clunking noises that might be mistaken for a control arm issue, but it can also change the way cornering loads are distributed, potentially adding stress to the control arm. Conversely, a loose control arm can put extra stress on the stabilizer link. The health of the system is holistic; weakness in one area often creates stress in another.
The Diagnostic Process: From Symptom to Solution
You've listened to your car, you've felt the changes in its steering, and you have a suspicion that a lower control arm is the culprit. What comes next? The diagnostic process is a logical progression from listening and feeling to looking and testing. It's about confirming the suspicion and pinpointing the exact point of failure. While a professional mechanic has the tools and experience to do this efficiently, an informed owner can perform several key checks to become a more active participant in their vehicle's health.
The Visual Inspection: What to Look For
The first hands-on step is a thorough visual inspection, which can often provide a definitive answer. Safety is paramount here. Never work under a vehicle supported only by a jack. Use properly rated jack stands on a level, solid surface and chock the wheels that remain on the ground.
With the vehicle safely supported and the wheel in question off the ground, you can begin your inspection. You will need a good flashlight.
- Locate the Lower Control Arm: Identify the arm. It will be the lower-most linkage connecting the subframe of the car out to the bottom of the steering knuckle/brake assembly.
- Inspect the Bushings: Focus on the two inboard pivot points where the arm meets the chassis. Shine the light directly onto the rubber bushings. Look for the signs of failure we discussed: deep cracks, splits, or tears in the rubber. Is the rubber distorted or bulging? Is the center metal sleeve visibly off-center? Is there evidence of fluid leakage if it is a fluid-filled hydraulic bushing (common in some luxury applications)? Any of these are red flags.
- Inspect the Ball Joint Boot: Now move to the outer end of the arm. Find the ball joint. Examine its protective rubber boot from all angles. Is it intact? Or is it torn, split, or covered in grease that has been flung out? A compromised boot means a compromised joint.
- Inspect the Arm Itself: Look over the entire length of the arm. Is there any evidence of it being bent or dented from an impact? Check for heavy flaking rust or corrosion that might suggest its structural integrity is weakened. Tap it with a small hammer; a solid "ring" is good, while a dull "thud" might indicate severe internal corrosion on a stamped-steel arm.
The Physical Test: Checking for Play and Movement
If the visual inspection is inconclusive, the next step is to physically check for looseness. This is where you attempt to manually replicate the forces that cause the noises and steering issues you experience while driving. For these tests, it is often best to have the vehicle's weight on the suspension, so you might perform them on a drive-on lift or by placing a jack stand under the lower control arm itself to compress the suspension. However, some tests are easier with the wheel hanging freely.
-
Checking for Ball Joint Play (Vertical): With the suspension loaded, place a long pry bar or a sturdy piece of wood under the tire. Have a helper lift up and down on the pry bar to load and unload the suspension. While they do this, watch the ball joint very closely. You are looking for any vertical movement or separation between the steering knuckle and the control arm at the ball joint. There should be virtually none. You can also feel for this "clunk" by placing your fingers over the joint as the helper moves the pry bar. Any perceptible vertical play indicates a worn, load-bearing ball joint.
-
Checking for Ball Joint and Bushing Play (Horizontal): Grab the wheel at the 3 o'clock and 9 o'clock positions. Try to wiggle it back and forth as if you were steering it. There should be no free play or clunking. If there is, have a helper look at the tie rod ball joint to see if it's moving. If the tie rod ball joint is tight but you still have play, the looseness could be in the lower ball joint or the control arm bushings allowing the whole assembly to shift. Now, grab the wheel at the 12 o'clock and 6 o'clock positions. Try to rock it in and out. Any clunking or movement here points strongly to a worn lower ball joint or, less commonly, a failing wheel bearing.
The core of what does a lower control arm do is to prevent this kind of unwanted movement. By manually trying to induce this movement, you are directly testing its primary function.
When to Seek Professional Assessment
While these at-home checks can be very revealing, there are times when a professional diagnosis is the best course of action.
- If you are not comfortable or do not have the equipment to safely lift and support your vehicle.
- If the symptoms are subtle or intermittent and your inspections do not reveal an obvious cause.
- If you suspect a bent control arm or frame damage after an accident. A professional shop has alignment racks and measuring tools to detect damage that is not visible to the naked eye.
- If you've identified a failed component but are not equipped or confident enough to perform the replacement yourself.
A qualified technician can use tools like chassis ears (electronic microphones placed on different suspension components) to pinpoint the exact source of a noise while the vehicle is being driven. They can perform more nuanced tests and have the experience to distinguish between, for example, a worn ball joint, a bad tie rod ball joint, or a failing stabilizer link, which can sometimes present similar symptoms.
The Replacement Imperative: Safety, Performance, and Cost
Discovering you have a faulty lower control arm may seem like bad news, but it is better to know than not to know. The decision to replace the component is not merely a suggestion; it is an imperative for maintaining the safety, performance, and even the long-term financial health of your vehicle. Delaying the repair is a gamble with escalating stakes.
Restoring Safety and Predictable Handling
This is the most compelling reason for replacement. A lower control arm is not a trim piece or an accessory; it is a fundamental part of the system that keeps your car under control. As we've established, a failing arm can lead to:
- Steering Wander: Requiring constant correction and reducing your ability to react quickly in an emergency.
- Sloppy Response: Delaying the car's reaction to your steering inputs.
- Braking Instability: Potentially causing the vehicle to pull to one side during hard braking.
The most frightening scenario is the complete failure of a load-bearing ball joint or the fracture of the arm itself. This results in the wheel becoming detached from its lower mounting point. The suspension collapses, the wheel can fold under the car, and all steering control for that wheel is lost instantly. This is a catastrophic event at any speed and is almost certain to cause an accident. By replacing a worn suspension control arm proactively, you are directly investing in the safety of yourself, your passengers, and others on the road.
The Economic Argument: Preventing Collateral Damage
It might be tempting to put off the repair to save money in the short term, but this is almost always a false economy. A failing lower control arm sets off a chain reaction of damage to other, often expensive, components.
- Tire Wear: As discussed, a bad arm will destroy your tires. A single new tire can cost hundreds of dollars. The cost of replacing a set of prematurely worn tires can easily exceed the cost of the control arm repair that would have saved them.
- Wheel Bearing Damage: The constant vibration and shock loading from a loose control arm can cause premature failure of the wheel bearing inside the hub assembly. This is another costly repair.
- Stress on Other Suspension Parts: A loose component forces others to work harder. A bad control arm can put extra stress on the shock absorber/strut, the upper control arm (if equipped), the stabilizer link, and the tie rod ball joint, accelerating their wear. What starts as a single point of failure can cascade into a full suspension overhaul.
By addressing the root cause—the failing lower control arm—you protect the rest of the system. Choosing a quality part, such as a robust aftermarket control arm, ensures that this protection is long-lasting. The cost of the repair should be viewed as an investment that prevents much larger, compounding expenses in the future.
The DIY vs. Professional Repair Dilemma
Once the decision to replace is made, the question becomes who will do the work.
-
DIY Replacement: For the experienced and well-equipped home mechanic, replacing a lower control arm can be a manageable, though often challenging, job. It requires a good set of tools, including a torque wrench, a ball joint separator (pickle fork or press), and potentially spring compressors if the strut needs to be removed. The primary benefits are significant cost savings on labor and the satisfaction of doing the job yourself. However, the risks are real. The job involves dealing with heavy components and potentially high-tension springs. An error in installation or failing to properly torque the fasteners can be just as dangerous as leaving the old part in place.
-
Professional Replacement: For most drivers, this is the recommended path. A professional mechanic has the correct tools, safety equipment (like a vehicle lift), and experience to do the job correctly and efficiently. They can also handle any unexpected complications, like a seized bolt or a related part that also needs replacement. Most importantly, a professional repair almost always includes a wheel alignment after the new arm is installed. This final step is absolutely essential. Replacing a control arm will always change the vehicle's alignment. Driving without a proper alignment will negate the benefits of the new part, causing poor handling and, once again, rapid tire wear. The labor cost is an investment in peace of mind and a guarantee that the job is done right from start to finish.
Frequently Asked Questions (FAQ)
What is the main purpose of a lower control arm? Its main purpose is to act as the primary hinged link between your vehicle's frame and the wheel assembly. It allows the wheel to move up and down to absorb bumps while also providing a critical pivot point for steering and resisting the forces of acceleration and braking.
Can I drive with a bad lower control arm? While you might be able to physically drive the vehicle, it is extremely unsafe to do so. A bad lower control arm severely compromises steering control, braking stability, and can lead to a catastrophic failure where the wheel detaches from the suspension, causing a complete loss of control.
How much does it cost to replace a lower control arm in 2025? The cost varies widely based on the vehicle, the part's material (steel vs. aluminum), and local labor rates. The part itself can range from $50 to over $400. Labor can add another $150 to $500 per side. A crucial part of the cost is the mandatory wheel alignment afterward, which typically adds $100 to $200.
Is it better to replace just the bushings or the whole control arm? In the past, pressing out old bushings and pressing in new ones was common. Today, for most modern vehicles, it is more time-efficient and often more cost-effective to replace the entire control arm assembly. The new arm comes with pre-installed bushings and a new ball joint, ensuring all wear components are new and properly fitted.
What's the difference between a lower control arm and a tie rod? A lower control arm manages the suspension's up-and-down movement and locates the bottom of the wheel. A tie rod is part of the steering system; its job is to push and pull on the steering knuckle to turn the wheel. Both connect to the knuckle, but they have different functions. The control arm handles vertical loads while the tie rod handles horizontal steering inputs.
Do I need to replace both lower control arms at the same time? It is highly recommended. Suspension components wear at similar rates. If the control arm on one side has failed due to age and mileage, the one on the other side is likely not far behind. Replacing them in pairs ensures balanced handling, predictable performance, and saves you from a repeat repair trip in the near future.
What is the difference between a control arm and a wishbone? The terms are often used interchangeably. "Wishbone" or "A-arm" specifically refers to a control arm that is shaped like the letter 'A' or a wishbone, having two pivot points on the chassis side and one on the wheel side. Most lower control arms are of this design, so the terms are functionally synonymous in many contexts.
Conclusion
The lower control arm, though hidden from sight, is a testament to elegant engineering, performing a constant, demanding ballet of motion and force management. It is the humble yet steadfast foundation upon which a vehicle's stability, comfort, and controllability are built. To ask "what does a lower control arm do?" is to probe the very heart of suspension dynamics. It is the component that grants the wheel freedom to float over imperfections while imposing the rigid discipline necessary for precise steering and secure handling. From its material composition to the design of its bushings and ball joint, every aspect is a calculated compromise between strength, weight, and flexibility.
Recognizing the symptoms of its decline—the clunks, the wandering steering, the unevenly worn tires—is more than just mechanical aptitude; it is an act of responsible ownership. These are not mere annoyances but warnings sent from the front lines of the battle between your vehicle and the road. Heeding these warnings and acting to replace a failing arm is a direct investment in safety, preventing the catastrophic failure that can endanger lives. It is also a financially prudent decision, a preventative measure that halts the cascade of collateral damage to tires and other suspension components. Whether you are a seasoned mechanic or a daily driver, understanding the profound role of this critical link empowers you to better maintain your vehicle and ensure that every journey is a safe and controlled one.
References
CarParts.com Research Team, & McCuistian, R. (2025, February 4). What do control arms do? CarParts.com.
J.D. Power. (2021, January 8). What is a control arm on a car?https://www.jdpower.com/cars/shopping-guides/what-is-a-control-arm-on-a-car
MOOG Parts. (2022). Guide to control arms.
TGQ Auto. (2024, January 19). The essential guide to control arms in vehicle suspensions. https://tgq-auto.com/the-essential-guide-to-control-arms-in-vehicle-suspensions/
YitaMotor. (2022, November 29). The complete guide to car control arms.
Deltona Tire & Auto Center. (2023, August 8). Suspension simplified: Everything you need to know about control arms. https://www.deltonatire.com/Blog/ArticleID/33/Suspension-Simplified-Everything-You-Need-to-Know-About-Control-Arms